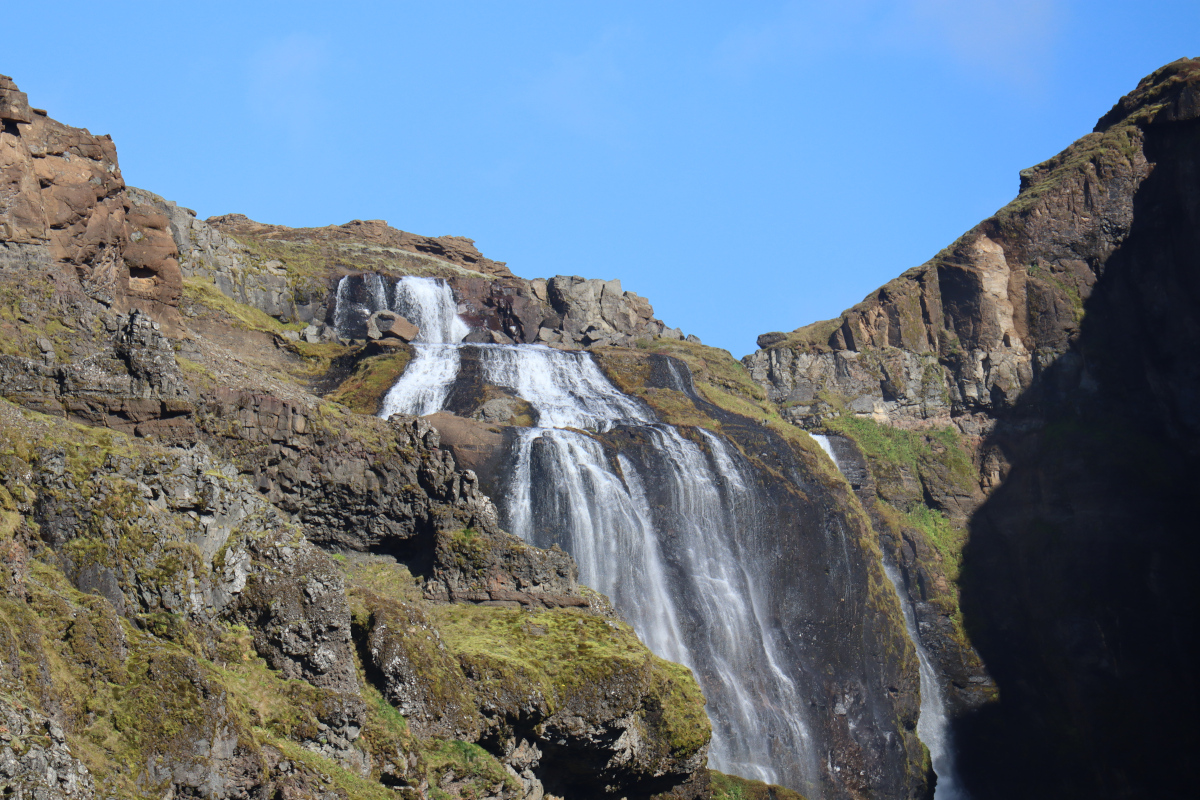
Glymur Falls
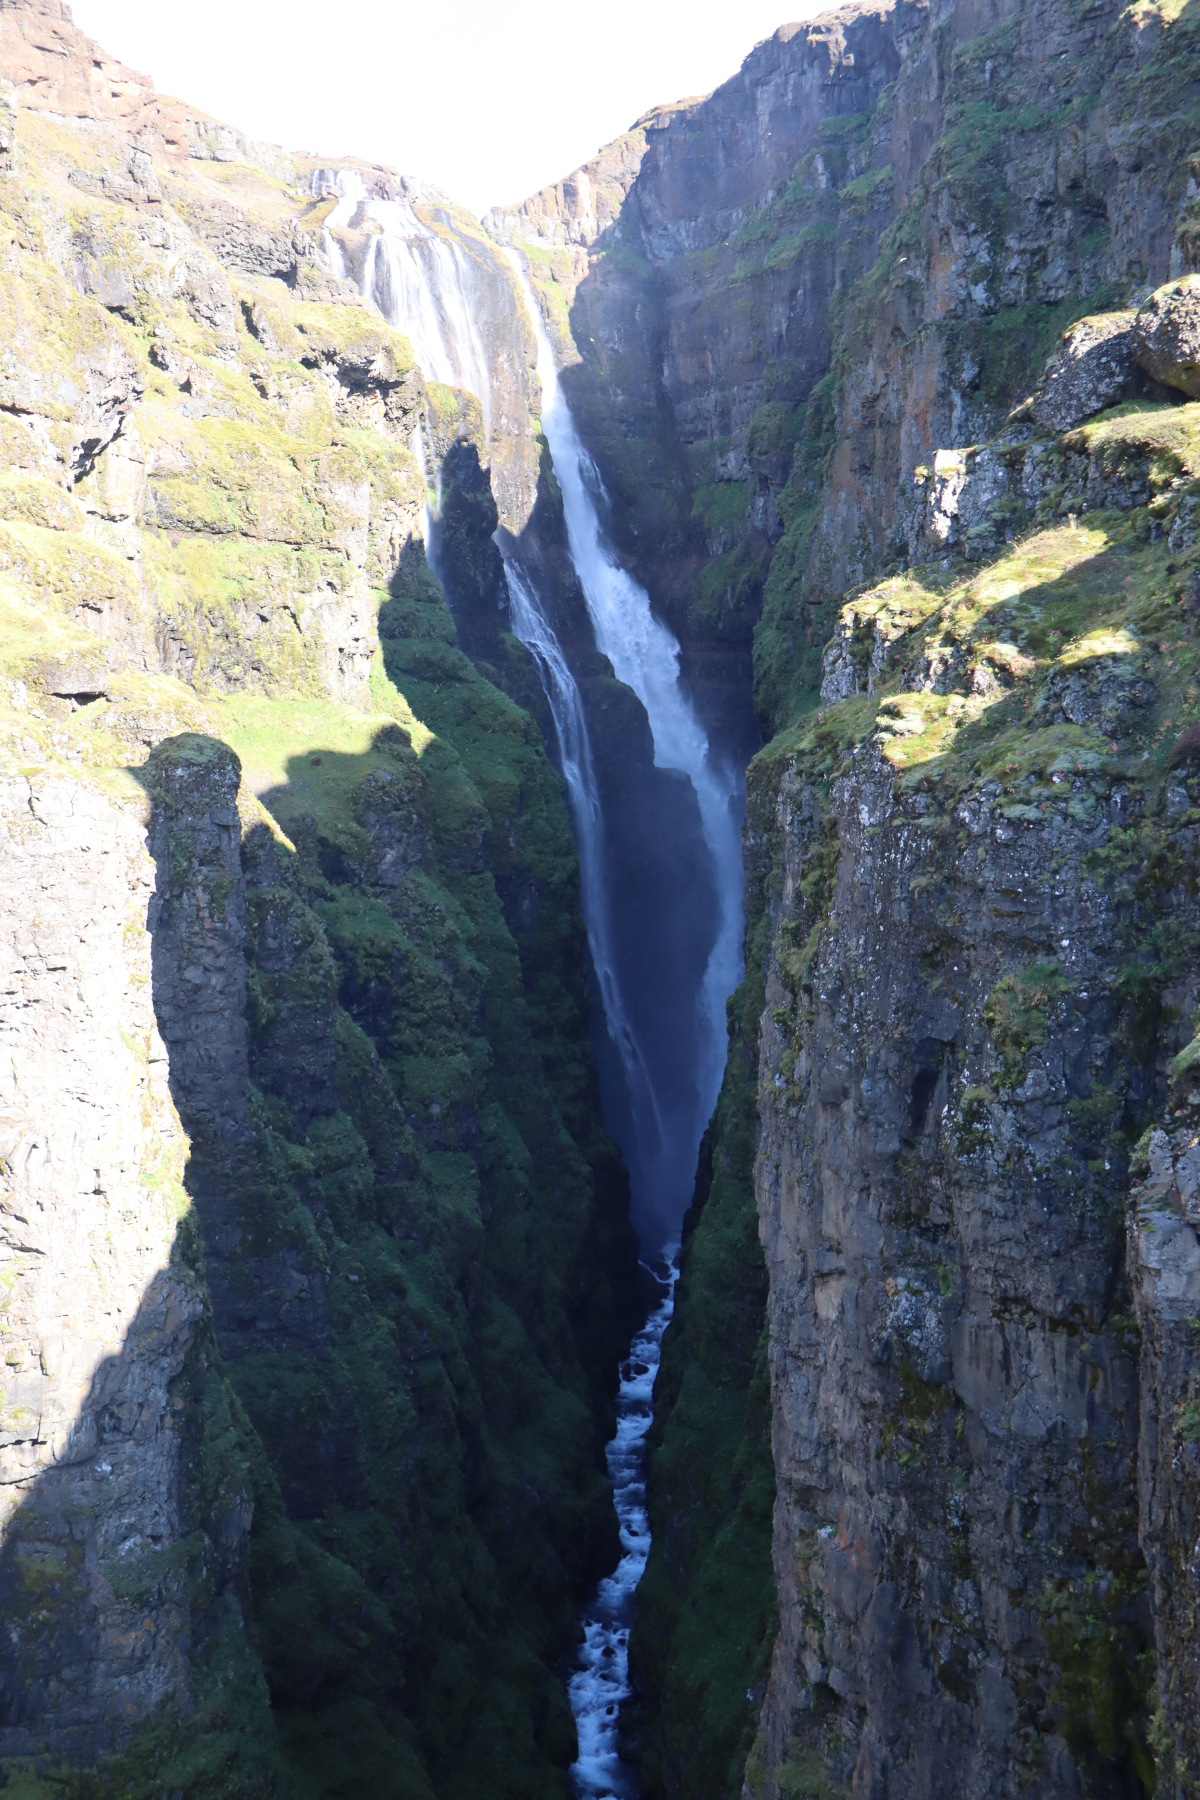
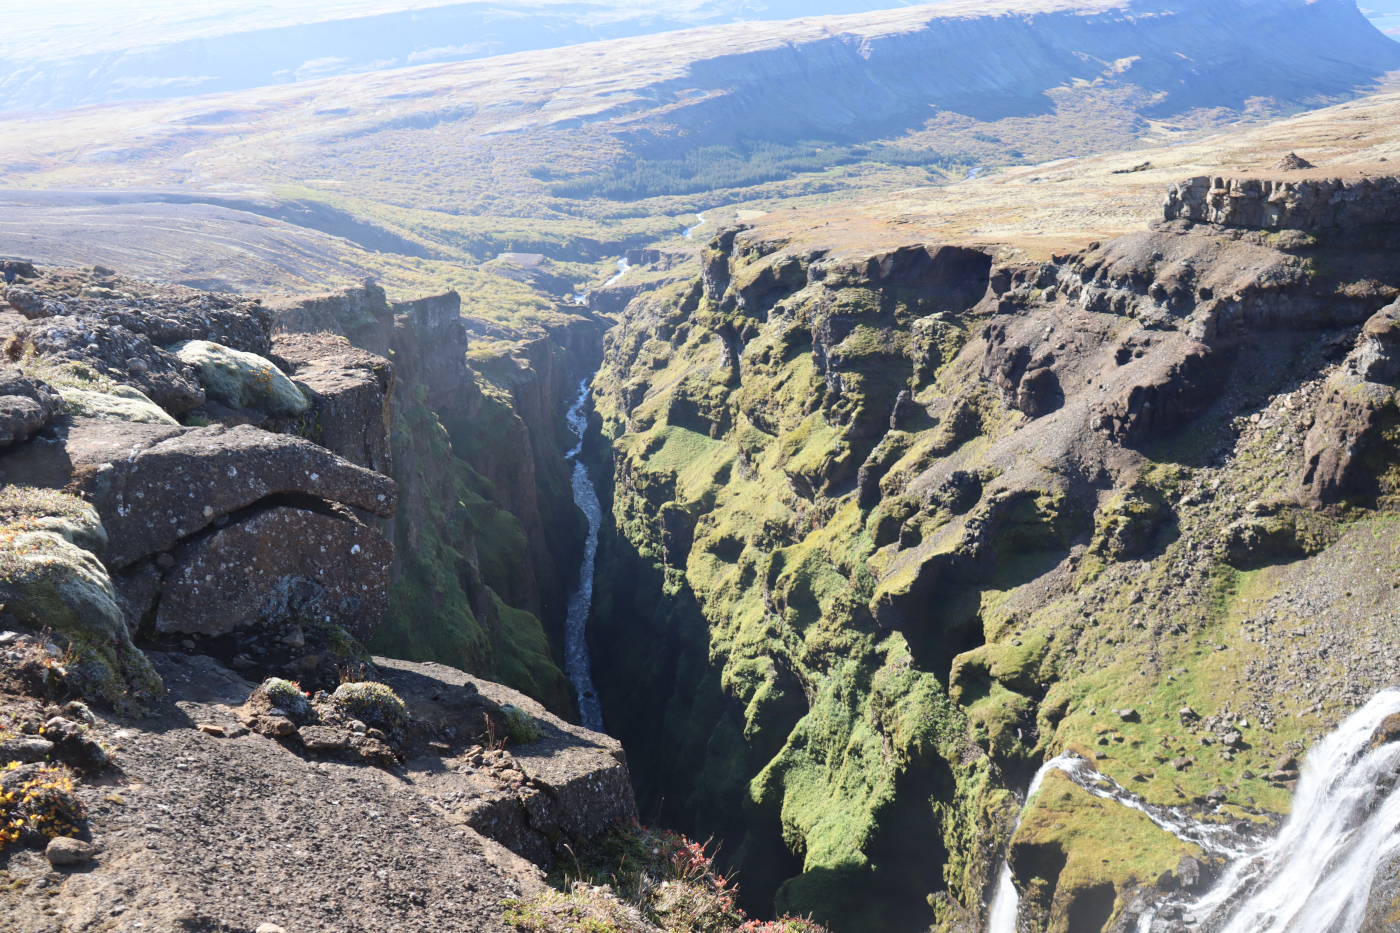
Glymur Falls is a popular day hike with stunning views of Iceland’s second tallest waterfall. The main trail passes through a small cave, has two river crossings and follows the edge of a deep canyon. The trail is fairly challenging, with a relentless 1,200ft ascent that often hugs sheer drops, so I would not recommend it for new hikers. If you’re not able to cross the river, perhaps due to recent heavy rainfall, then there are still grand views from the west side of the canyon, though the waterfall itself is not visible.
You will need good hiking boots. It helps to have water shoes (for wading the river above the waterfall) but they are not essential. We found hiking poles generally helpful.
The full loop is about 4.5 miles, but expect it to take between 2 to 4 hours, depending upon your speed and how many times you stop to take photographs.
Map §
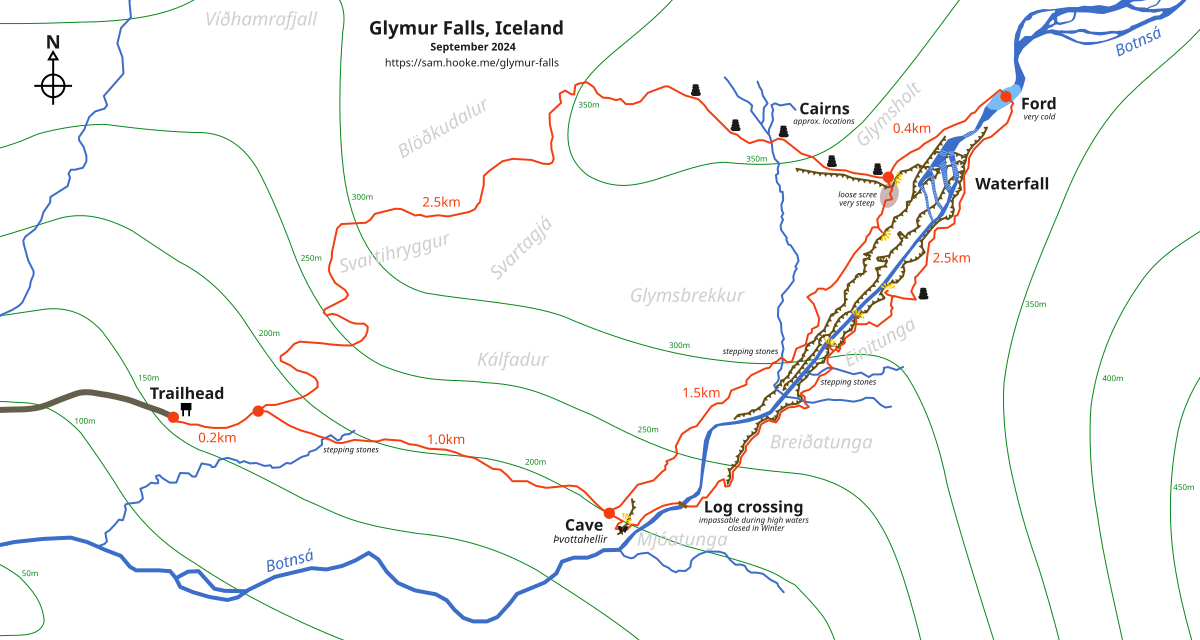
There are multiple possible routes you can take. I created this map to help show the routes, distances, key landmarks and viewpoints:
You can download a copy of the map below:
Details §
We went anti-clockwise, doing the log crossing first, following the east side of the canyon up, then wading through the river and following the west side of the canyon down. This route has the benefit that you get the log crossing done first (since it may not be passable if the river is too high), and then get a better view of the waterfall as you ascend on the east side.
Instead of descending along the west side of the canyon, you can follow the top of the ridge and descend nearer the car park.
| Distance | 7 km / 4.35 miles |
|---|---|
| Elevation gain | 366 m / 1200 ft |
| Duration | 4h |
| Moving | 2h |
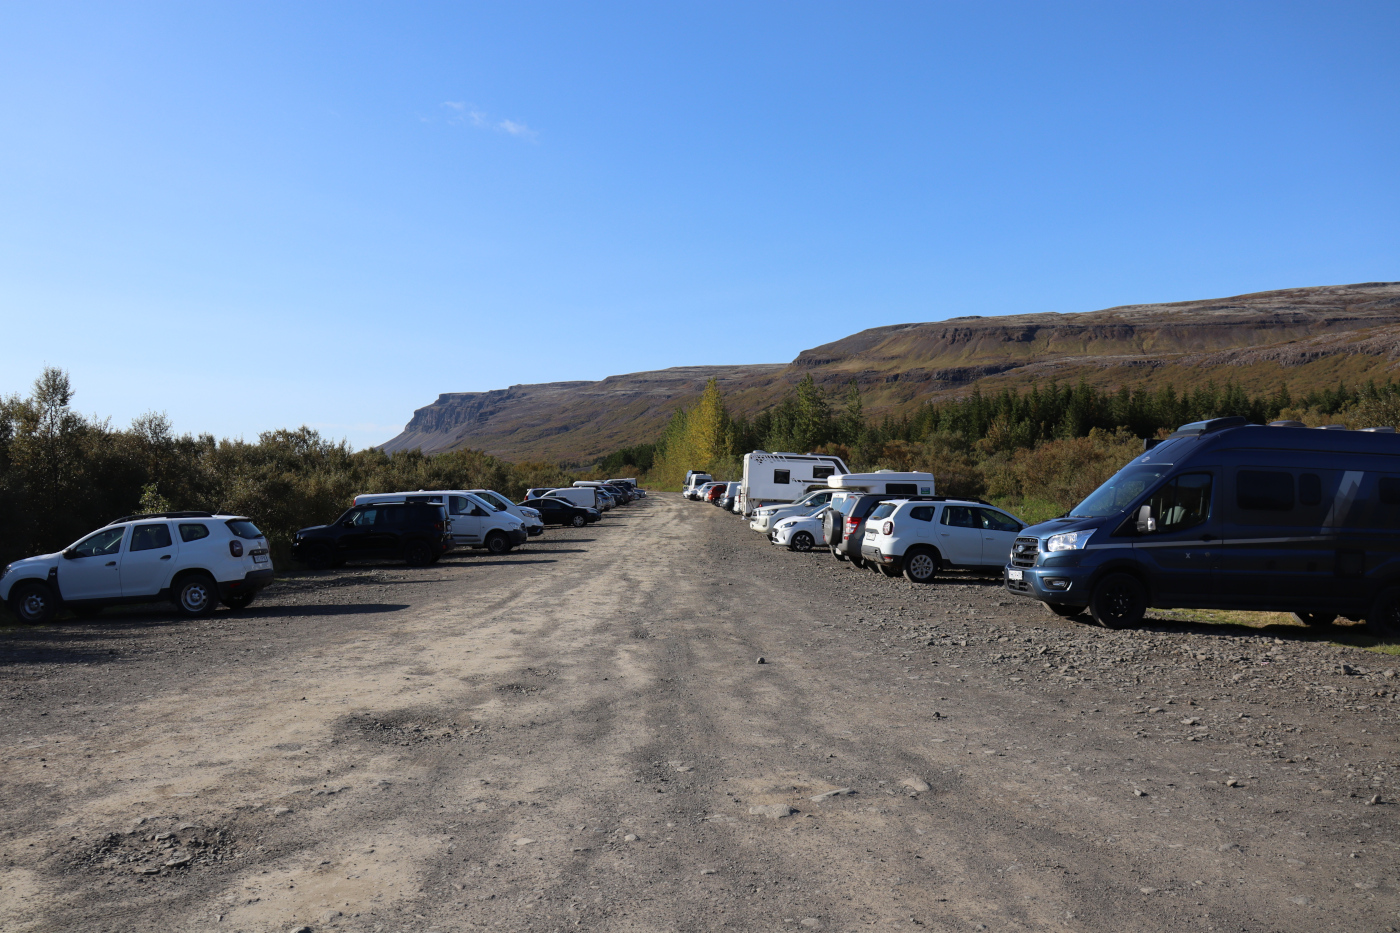
Trailhead §
There is a large gravel car park. We arrived on a weekend at 11:30am and there was still plenty of space (though by the time we got back down it was much busier, though still not full). Parking is free, and there are no toilets.

Here is a transcription:
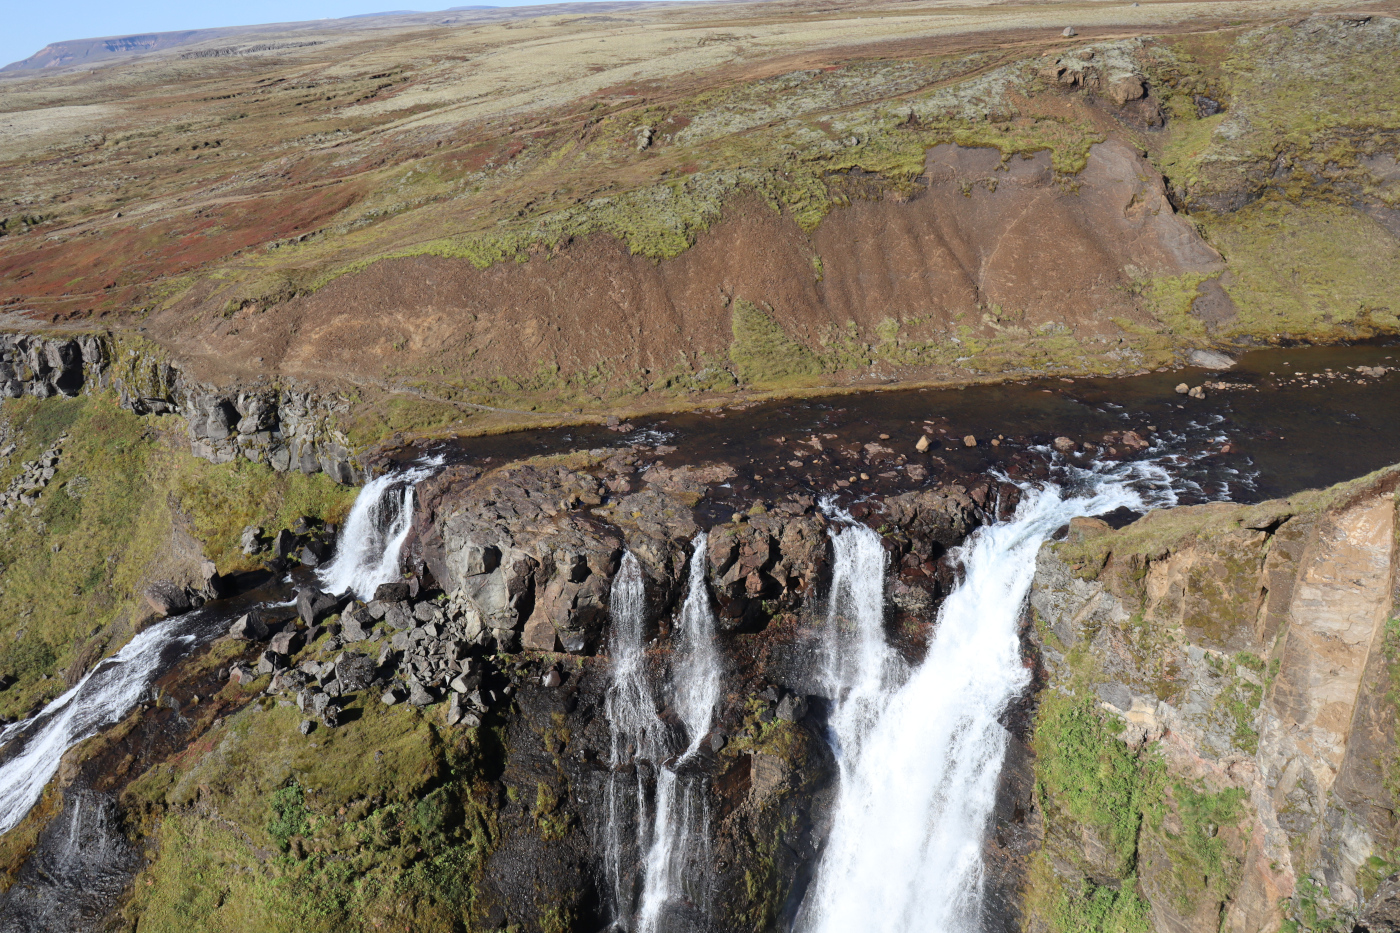
Glymur, in the river Botsná, is the highest waterfall in Iceland, around 198m high.
Actually, with a drop of 228m, the tallest waterfall in Iceland is Morsárfoss! While Glymur may have been the tallest at the time this sign was made, new waterfalls have been formed with the melting of the Morsárjökull glacier. According to Morgunbladid (Icelandic), Morsárfoss was officially measured on 12th June 2011 and found to be about 30 meters higher than Glymur, though the waterfall is believed to have been visible as early as 2007.
Continuing on:
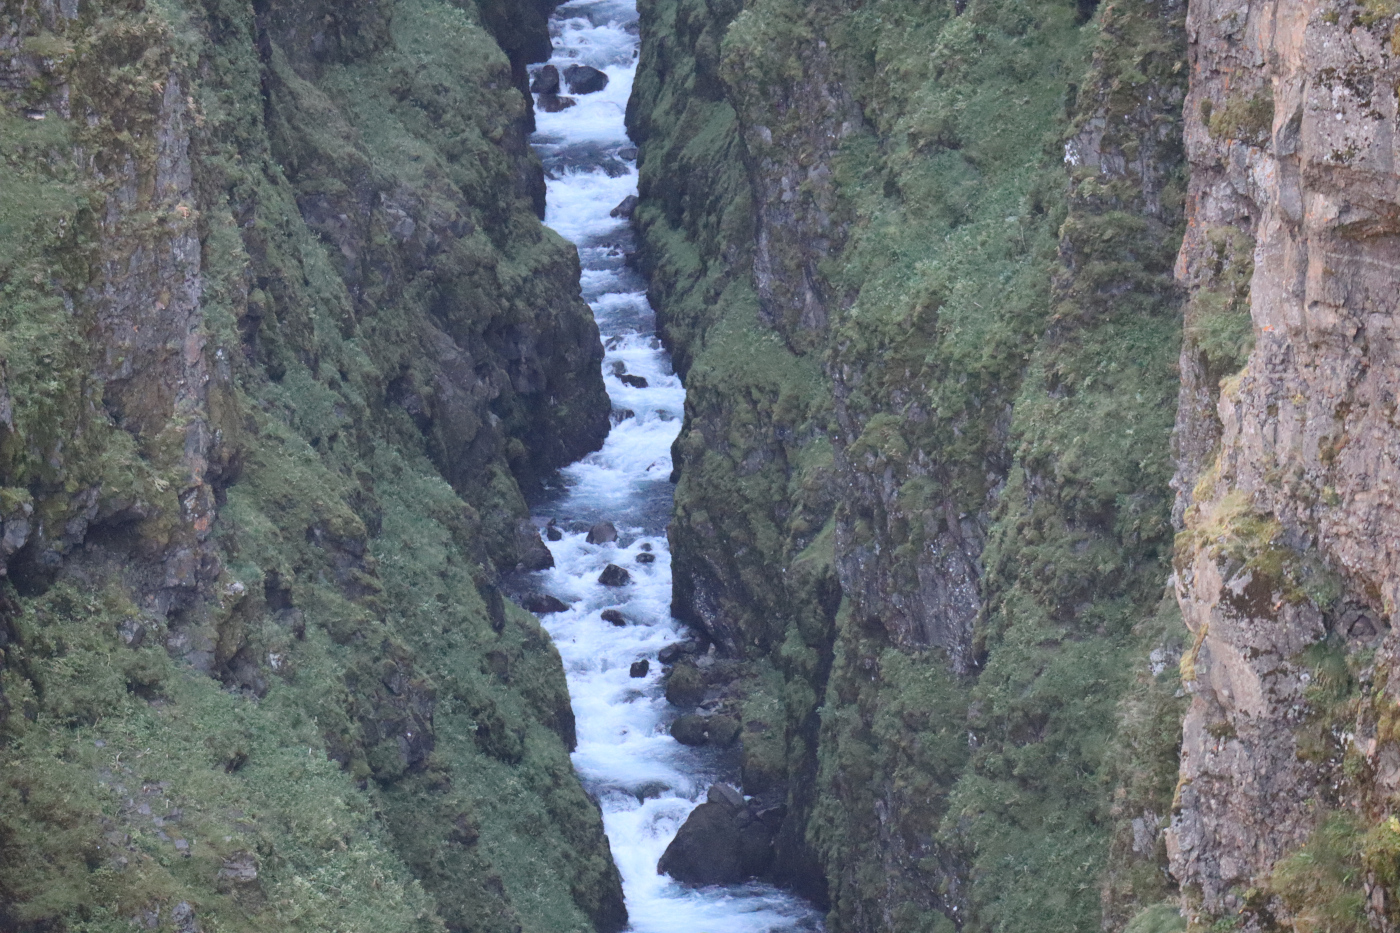
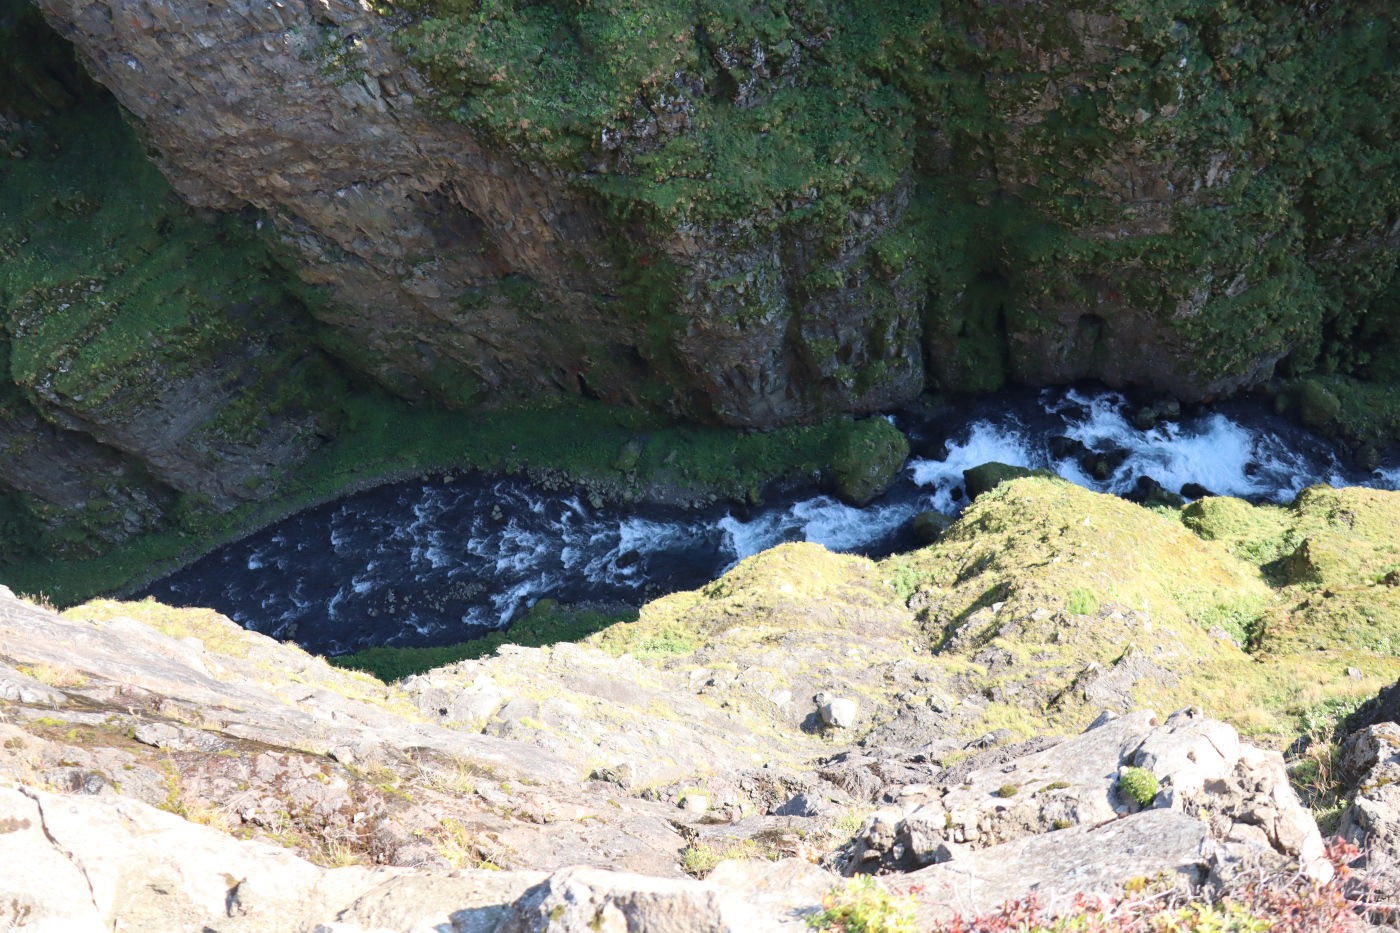
Botsná runs from the lake Hvalvatn and tumbles from a height of 300m above sea level down a short, but very deep canyon into the valley Botnsdalur. The lake Hvalvatn is the second deepest lake in Iceland, around 160m deep. Guests are welcome to hike - at their own risk - along marked trails up to the viewpoints Steðjasnös and Hellupallur from where it is beautiful to watch the waterfall tumble into the canyon Glymsgljúfur. Those who want a better view of the canyon and the upper part of the waterfall continue walking up along the canyon. The entire waterfall cannot be viewed, but you can get a better overall view of the canyon. Then you can either follow the same trail back or wade across the river about 300m above the waterfall. From there you walk down along the west side of the canyon, or along an easier trail on the mountain edge on the right hand to the west and down the ridge, Svartihryggur.
- Good hiking boots are necessary.
- The trail to Glymur (6) can be dangerous as there are crumbling rocks in many places. Hikers travel at their own risk.
- Beware of risk of falling. Some areas can be very slippery, especially when the ground is covered in snow or wet.
- A log lies across the river from spring till autumn so that hikers can walk across without getting wet, except when the river floods, then hikers must wade, if possibe, to the log from the west. However, the log is removed during the winter months because of the risk of slipping on the trail in snow, ice or mud, and floods breaking the log. The log can be wet and slippery - any time of the year - and it is not for those who are afraid of heights!
- The waterfall can only be seen from the eastern side of the river. The river must therefore be crossed in order to see it.
- Estimated hiking time to Þvottahellir (2) and back is: 1 hour.
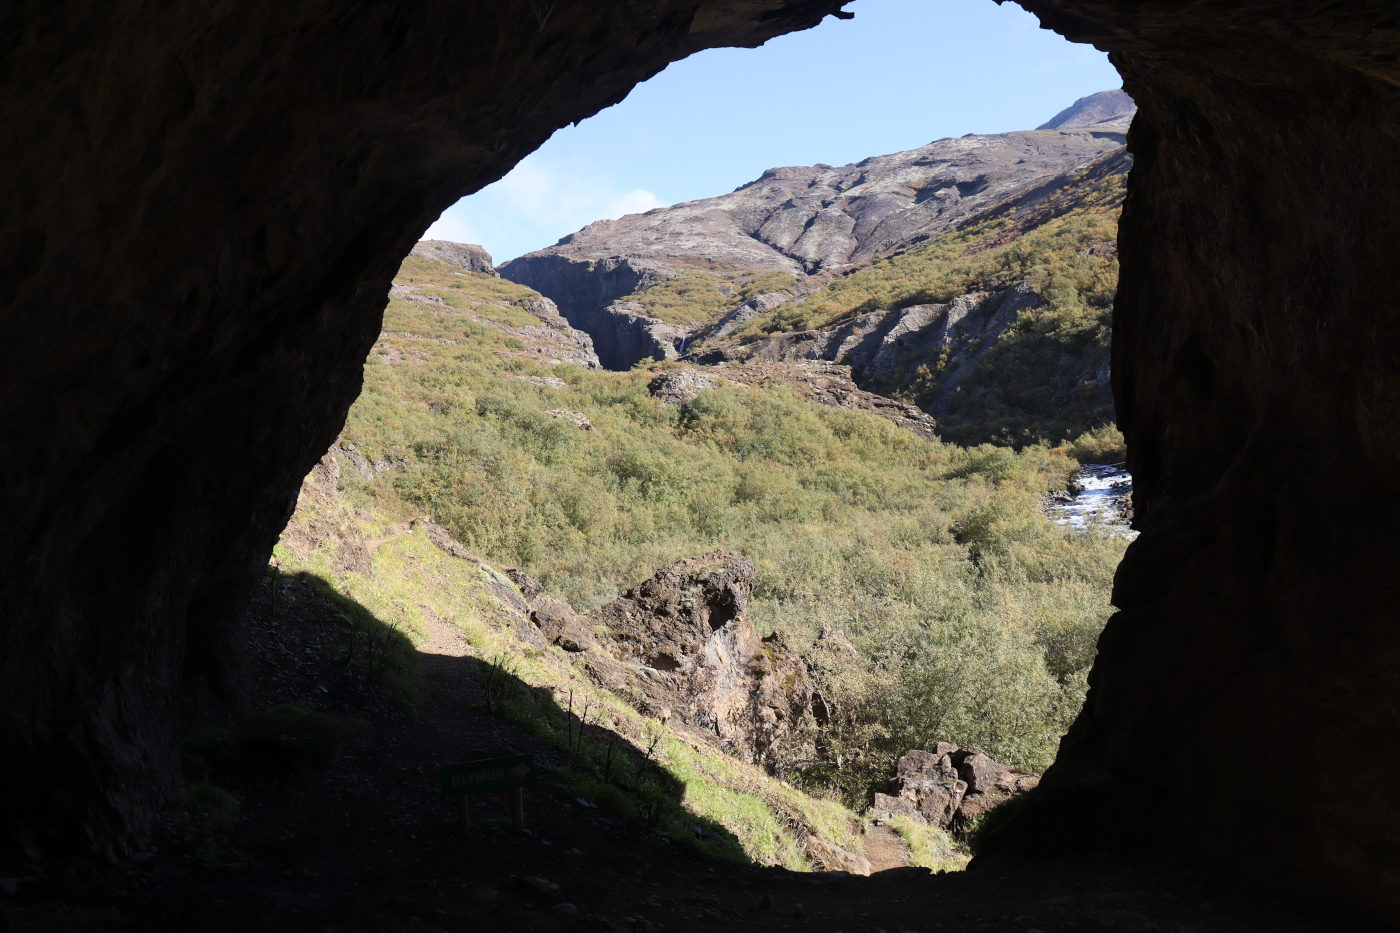
Þvottahellir is a small cave, which gets a lot of sun light, that the hiking trail passes through.
- Estimated hiking time to the viewpoints Steðjasnös (4) and Hellupallur (5) and back is: 3 hours.
- It is passible to wade the rocky and cold river about 300m above the waterfall (7). For that purpose, it is good to bring along shoes to wade in. From there you can either walk down along the west side of the canyon, or along an easier trail on the mountain edge on the right hand to the west and down the ridge, Svartihryggur. The hiking trail via the ford is 7.1km.
- To the car park (1) from the ford (7) it’s the same distance, around 3.5km, whether you hike down west of the canyon or west on the easier trail and down Svartihryggur. The hiking trail via the ford is 7.1km.
- From the car park (1) to the ford (7) is around 3.6km, if hikers go east of the river towards Glymur.
- Please be respectful and take good care of the environment!
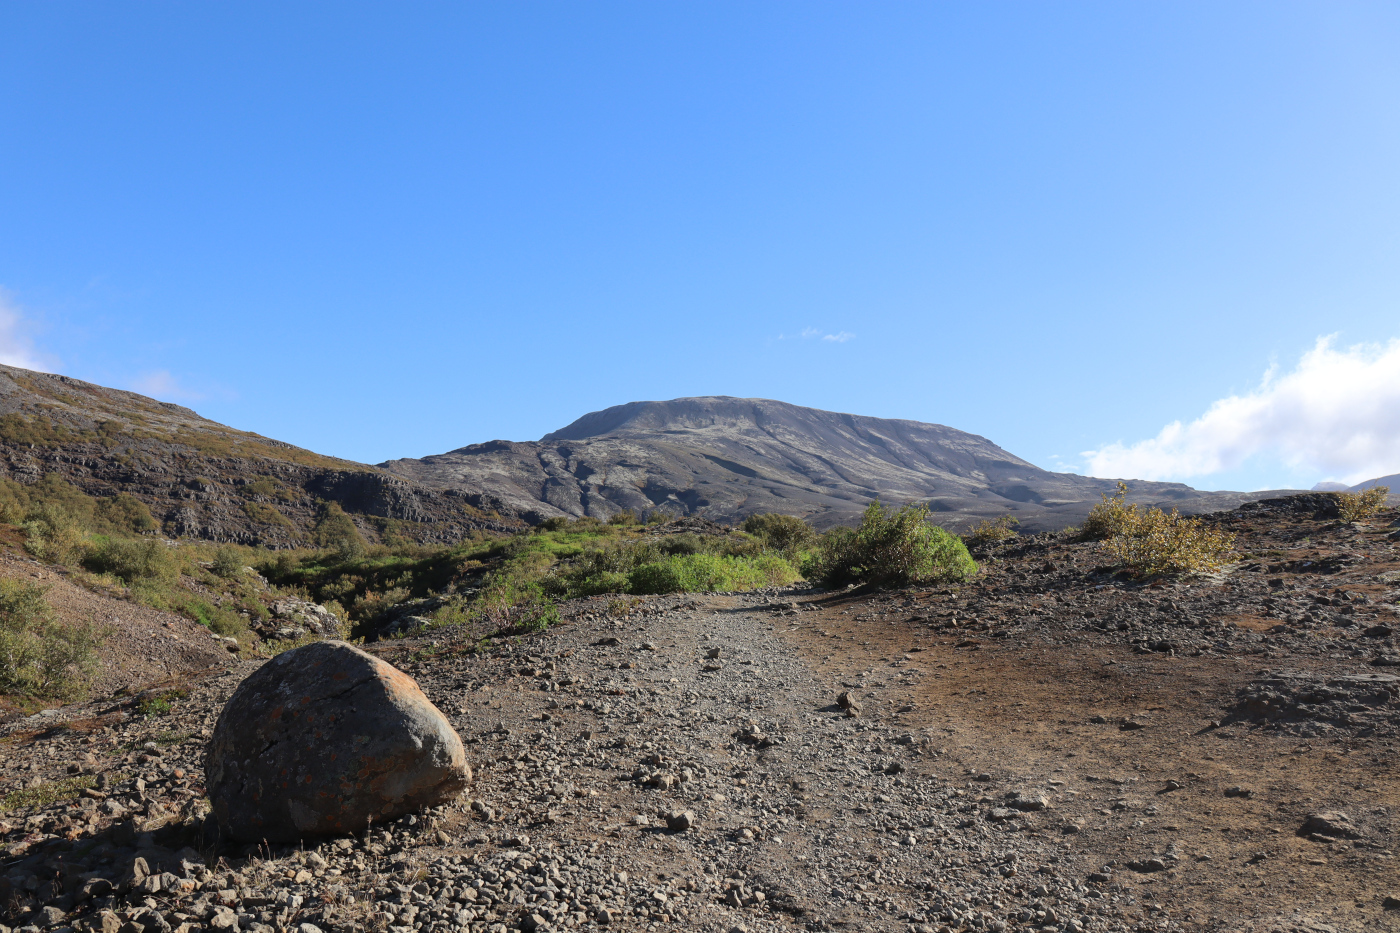
The Hike Begins §
The trail from the car park to the cave is easy going.

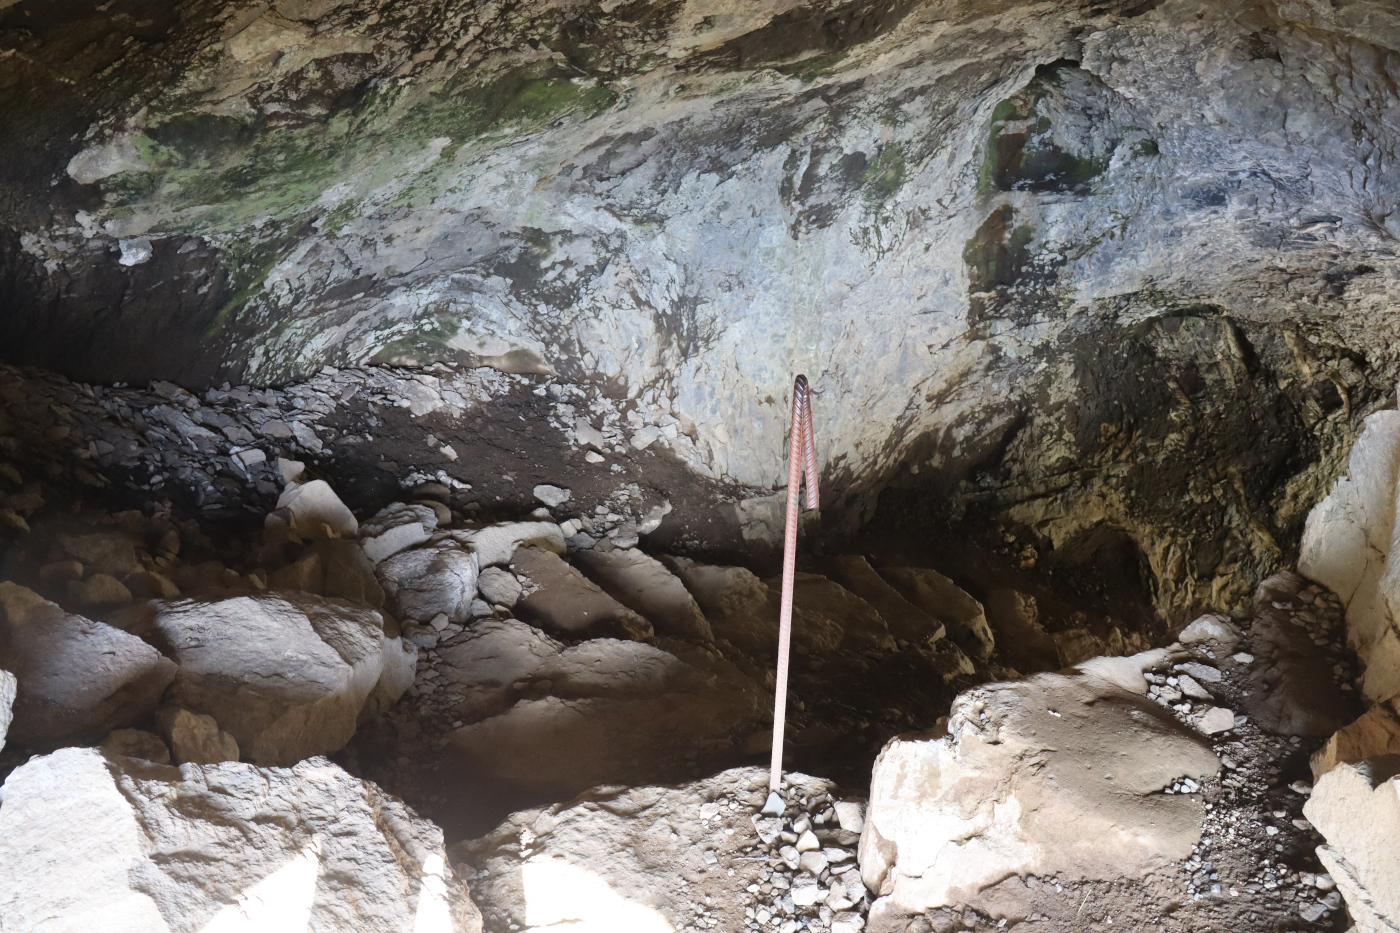
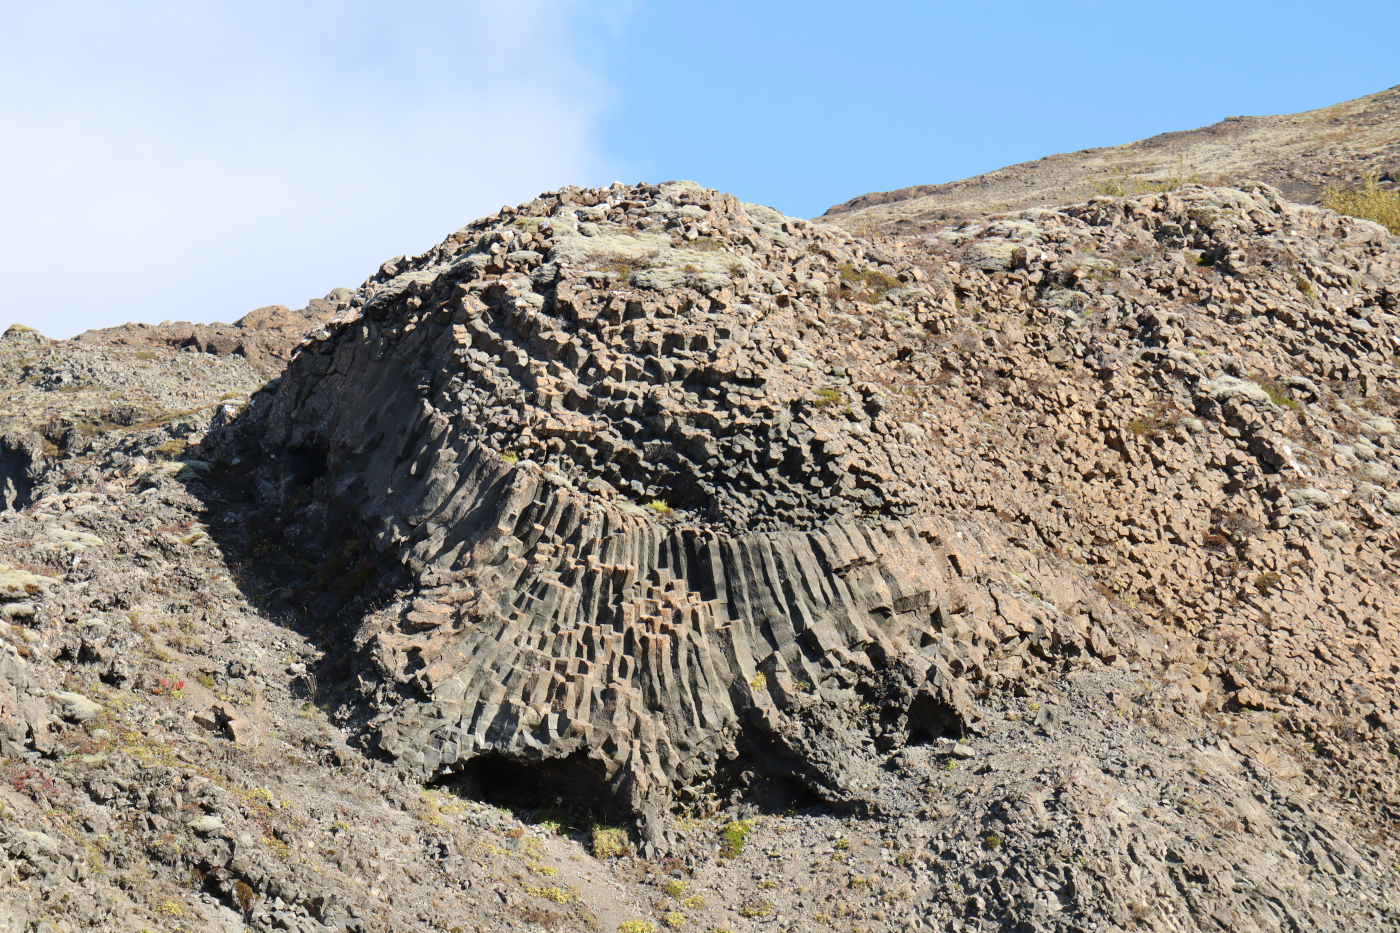
Þvottahellir (The Cave) §
The cave is well lit, has solid steps and a solitary pole to help your first step down.
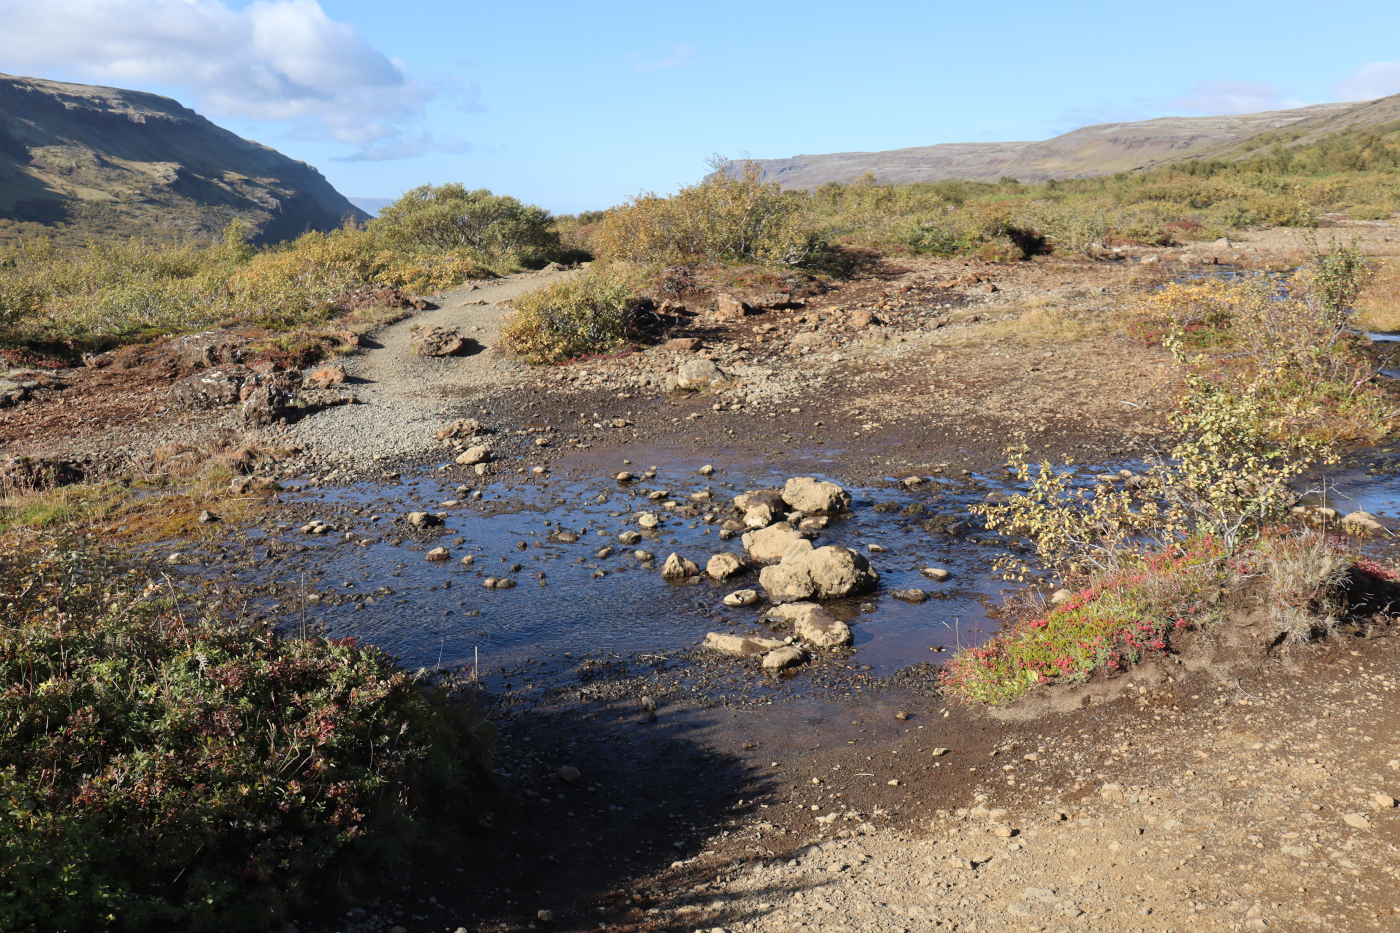
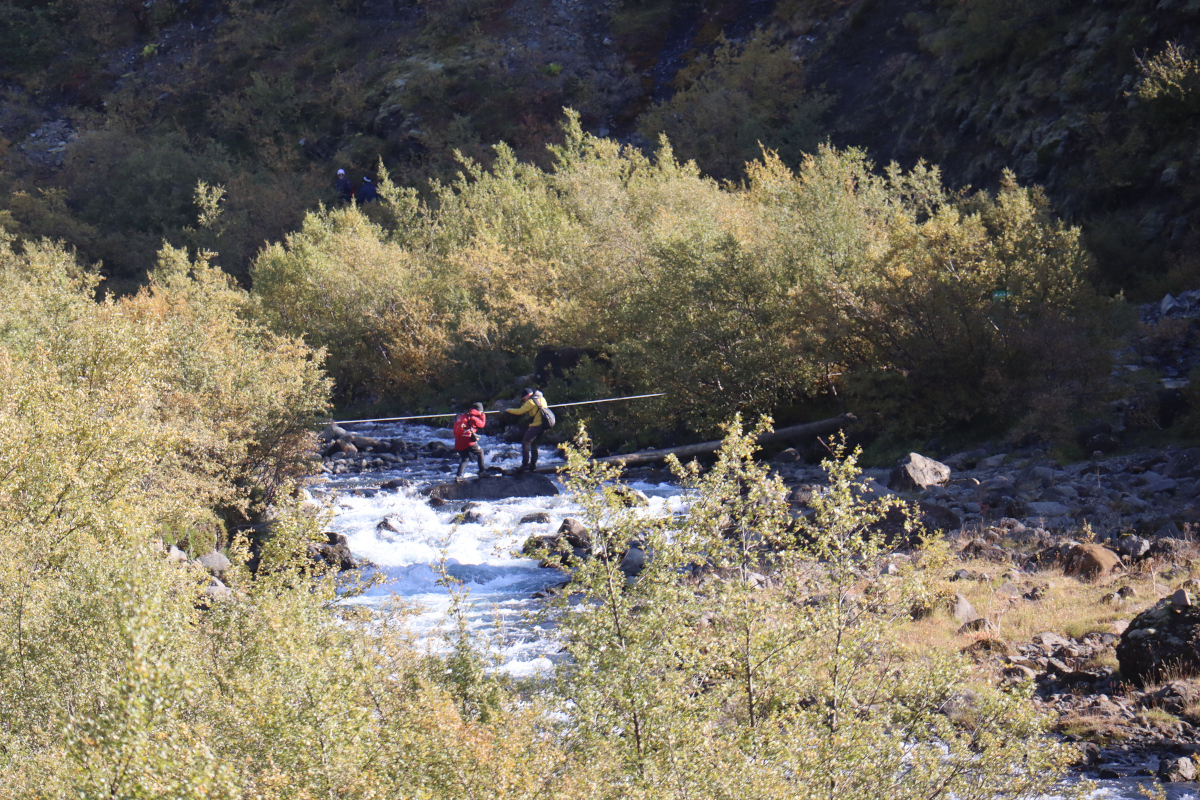
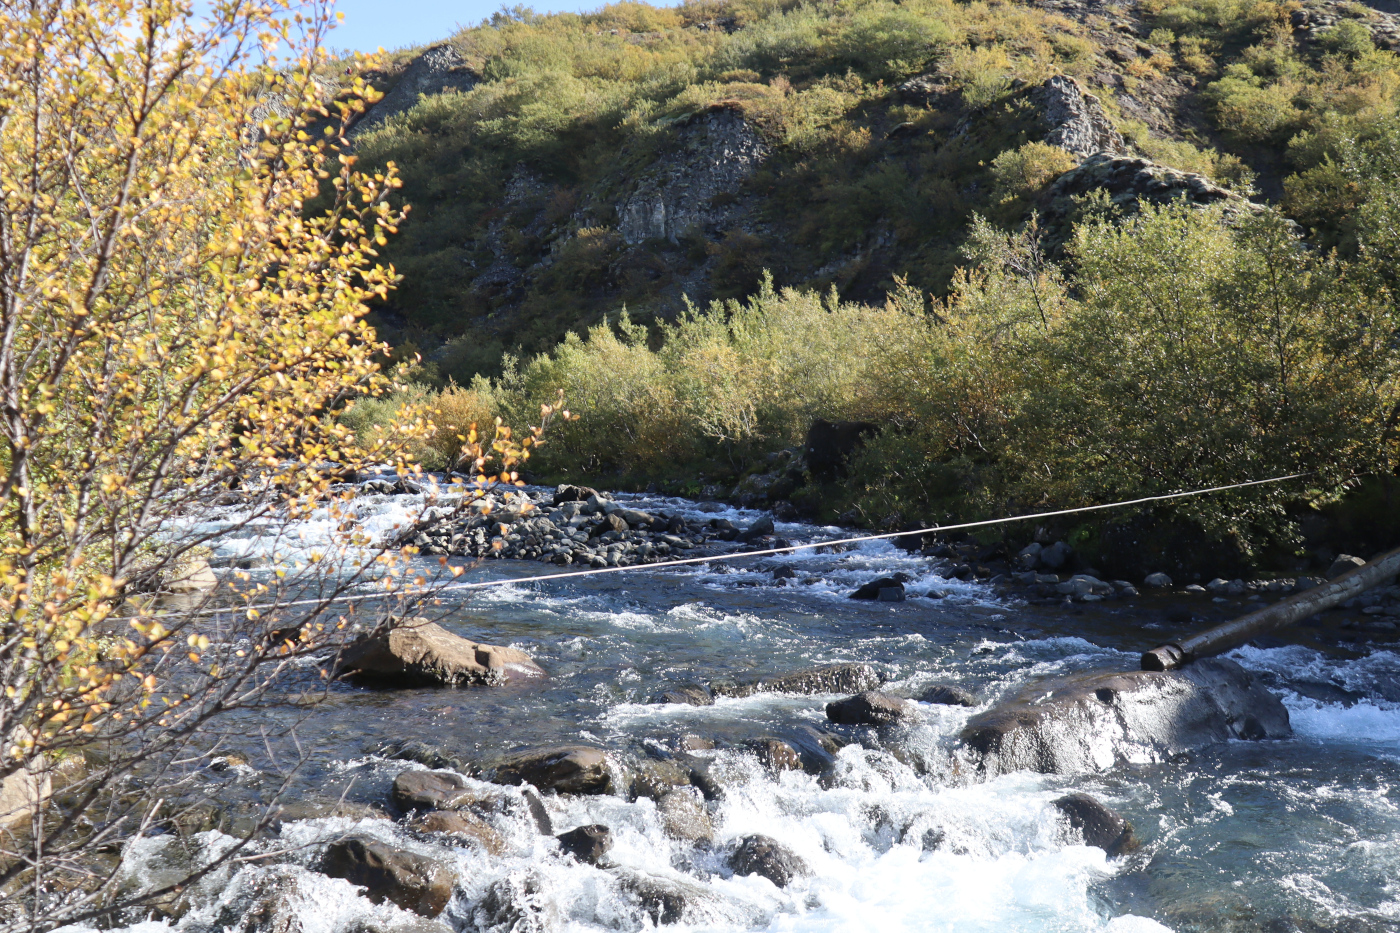
The Log Bridge §
The log bridge is not always passable. The log itself spans about 1/3rd of the river, the first 2/3rds are large stepping stones. We found the stones to be stable, but some were partially submerged. For a hand hold, a metal cable spans the river.
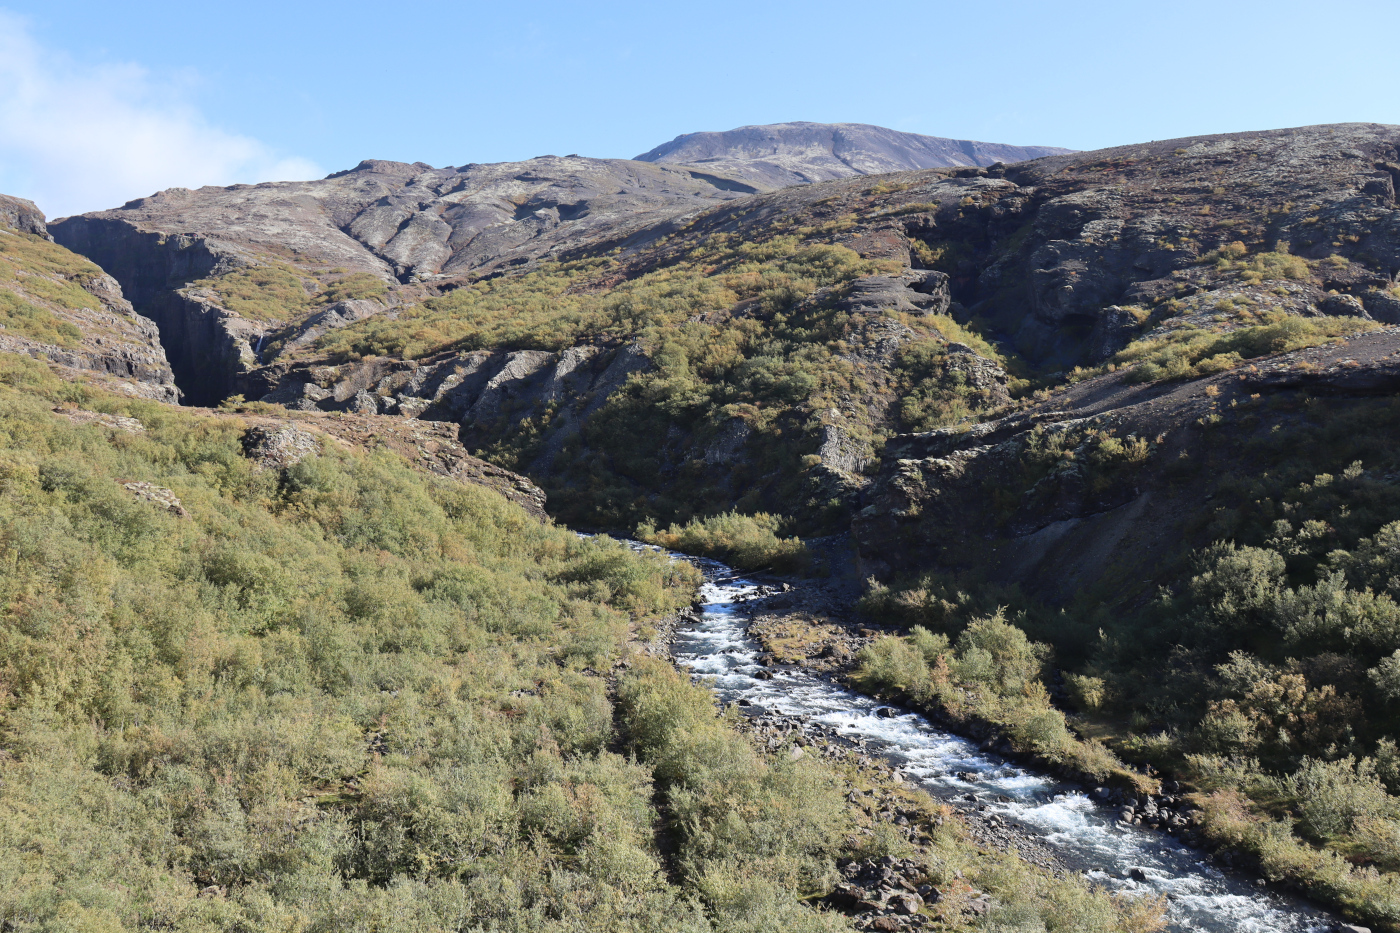
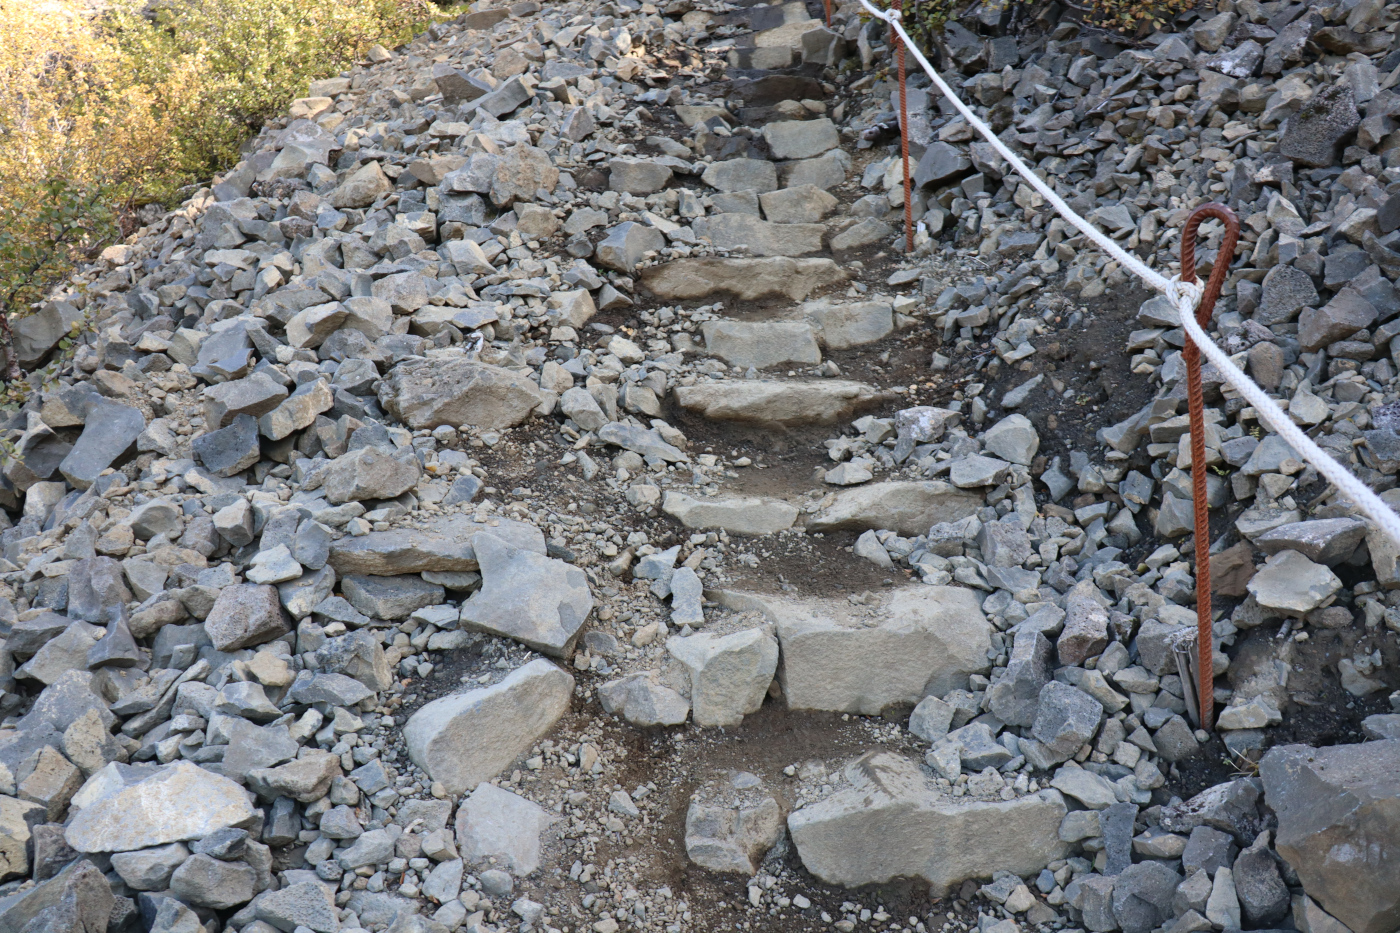
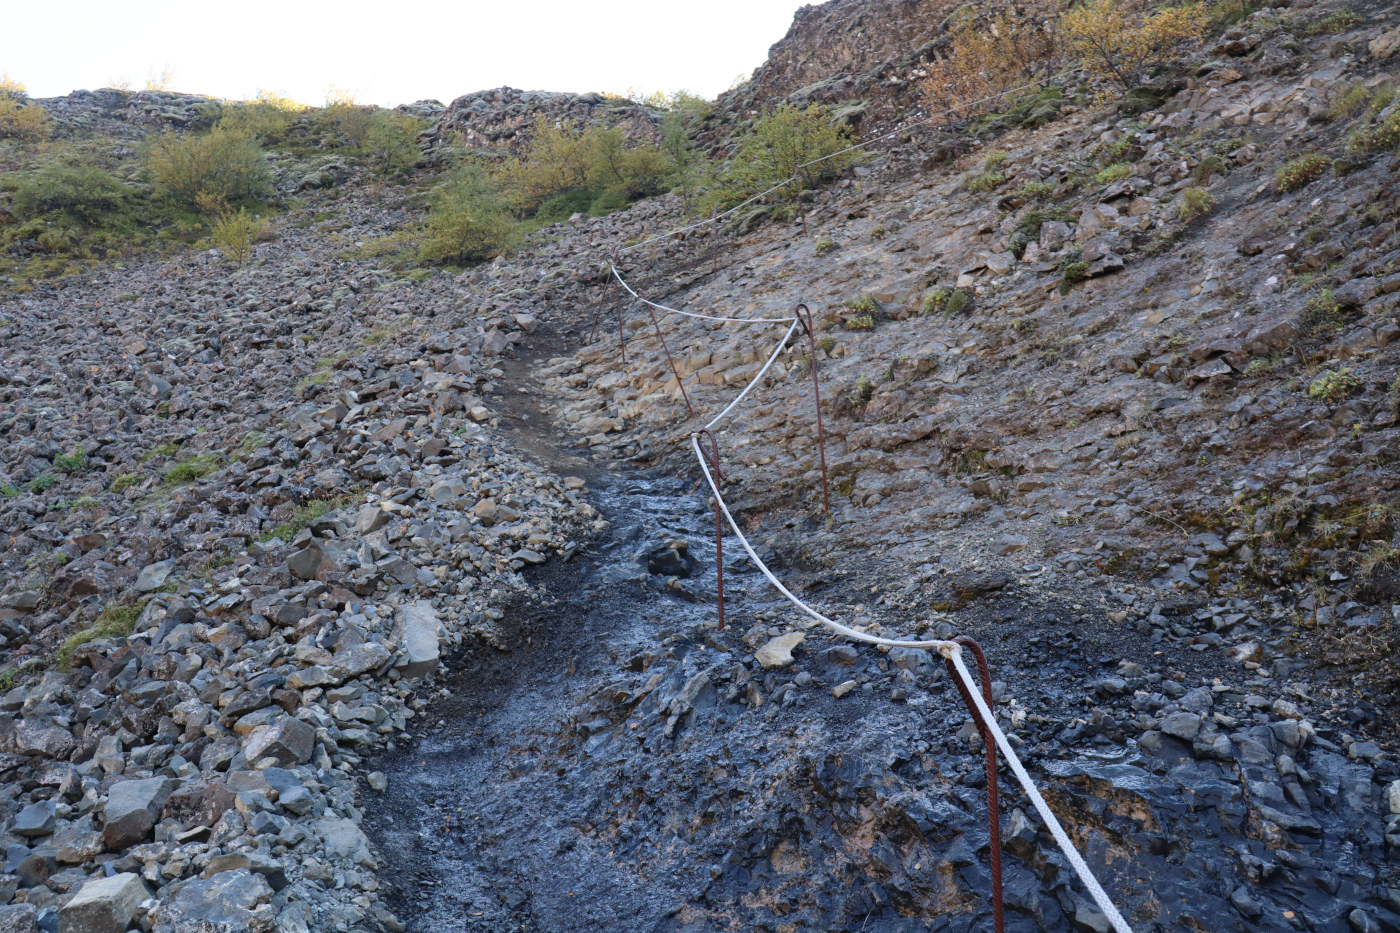
Ascent §
The ascent up the east side of the canyon is very well sign-posted, with lots of well-maintained steps and ropes for hand-holds. There is only one trail, all the side trails are clearly signed as off limits. Make use of the multiple viewpoints on the way up to appreciate the canyon from different angles.
There is arguably one fork in the trail as you get near the top, which has an unmissable sign, with arrows pointing both left and right. It’s not immediately obvious, but the left arrow takes you to a dead-end with a bench and a fantastic viewpoint, literally just a few steps around a blind corner. The right arrow is where the main trail continues on up.
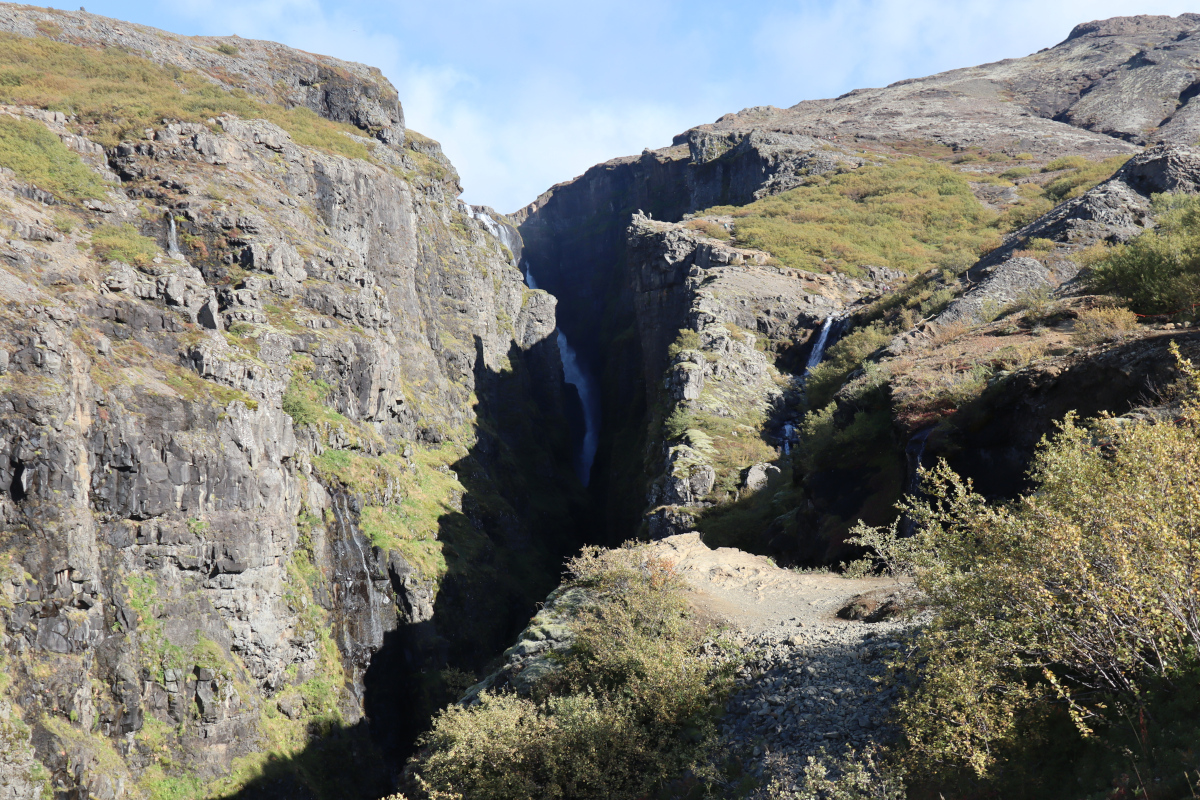
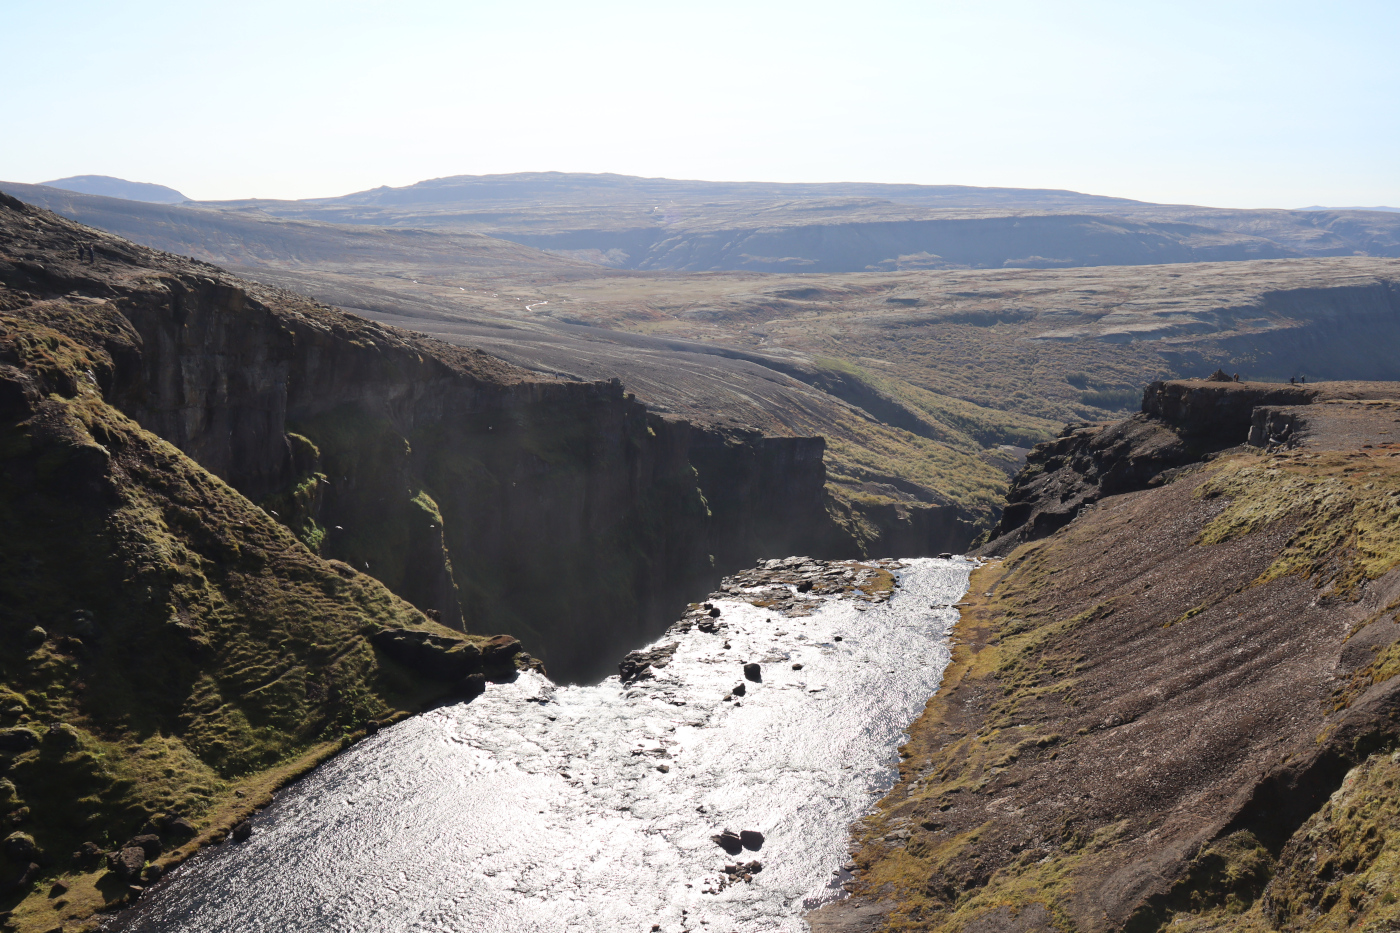
The Top §
After ascending about 1,200ft, you will reach a windy plateau with spectacular views both into the distance and downwards. This part felt most treacherous, since at times the path comes right up to the cliff edge, and there is no longer any shelter from the wind. Fortunately this is brief, and the path soon descends down to a calm river bank.
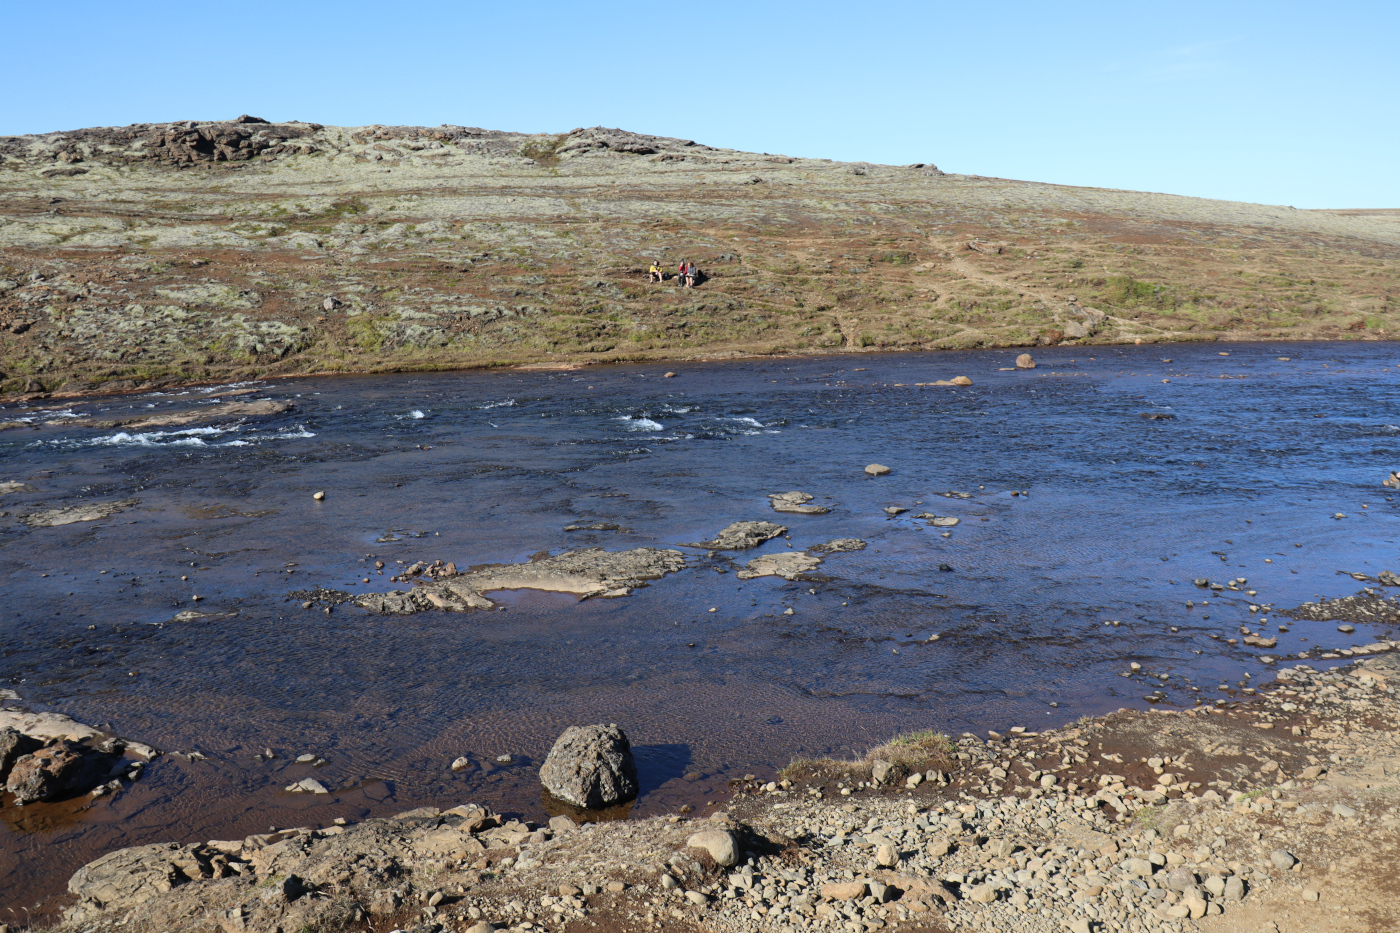
Wading the River §
There is no other way across. Time to take off your boots and socks, and roll up your trousers above knee height. If you’ve planned ahead, you might even have water shoes! The water is very cold, and the depth varies from ankle deep to upper shins. The river is approximately 30m (100ft) wide and the widest and generally shallowest point.
We watched different people take different routes across. Some people tried to cross where it was narrow, but found that the water got too deep and had to turn back. Others tried to rush and slipped over. The rocks are mostly quite smooth, but the big ones can be a bit slippery.
My suggestion is to watch other people cross first, and then learn from them! We crossed on the right side of the photo below, where there is no white water, the river is very wide and slow, and where there is a very low-lying island (if you can call it that) about 2/3rds of the way across.
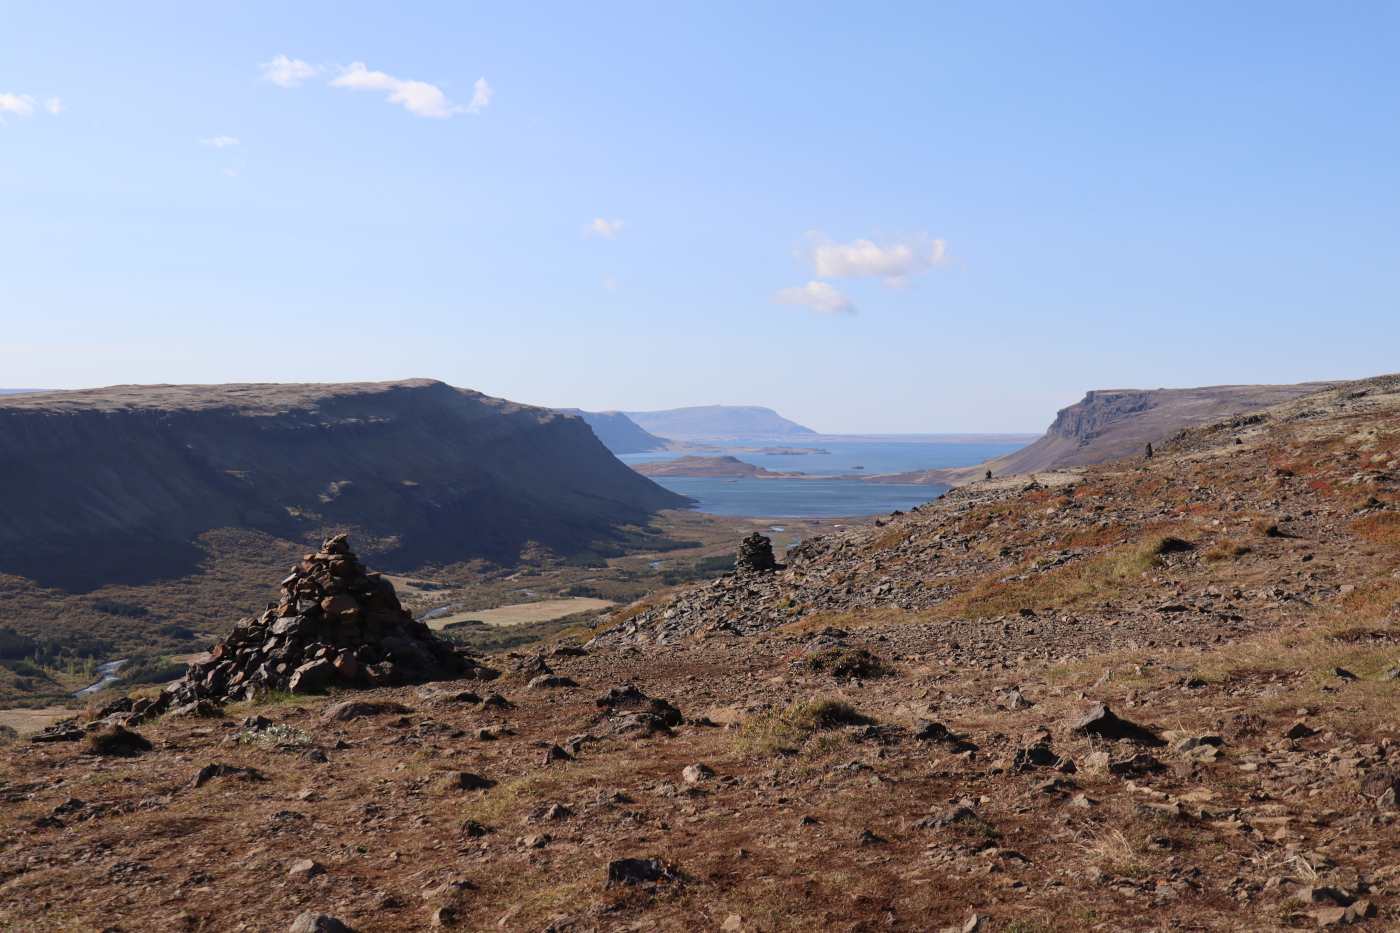
The Descent §
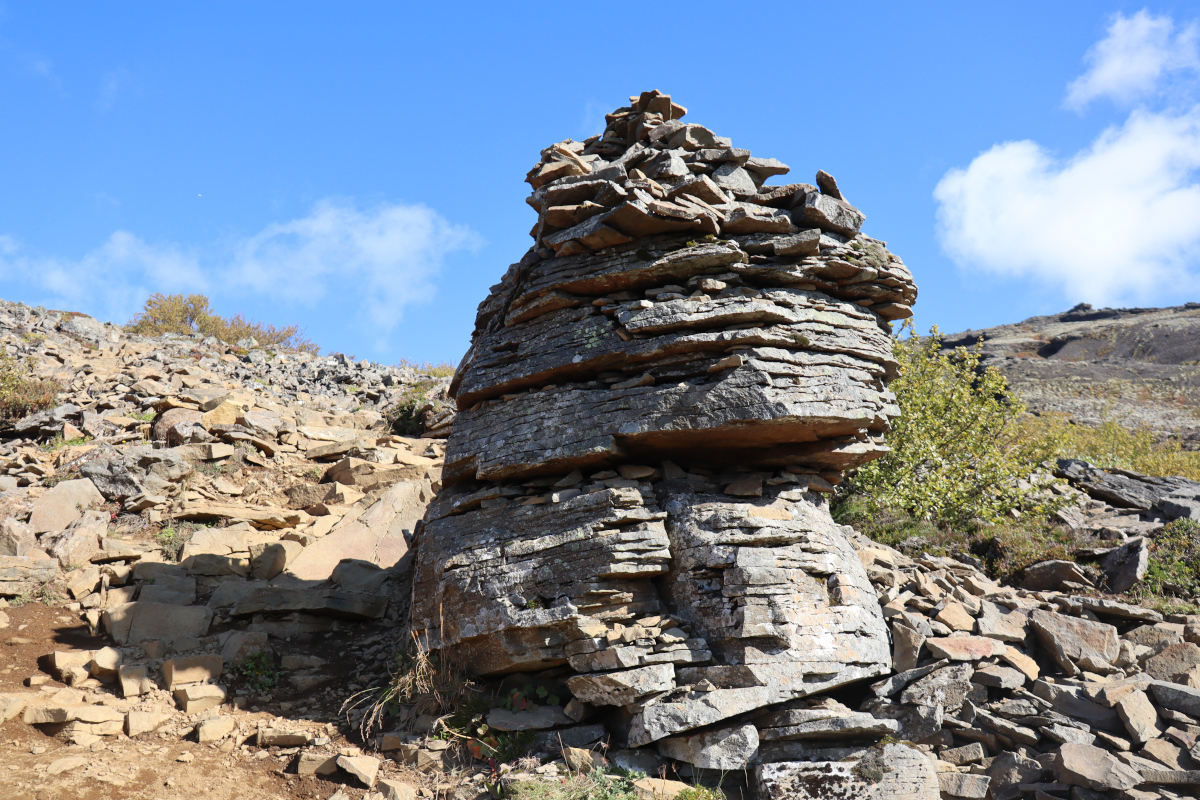
There is a little ascent after the river crossing up to another windy plateau, and then on to a line of cairns. Here the trail forks, with the right trail heading along the top of the ridge away from the river, while the left trail brazenly drops downwards, staying close to the canyon. We took the left fork.
Unlike the ascent, the desent on the west side of the canyon has almost no signs marking the way, and there is no single clear trail to follow. It feels like a maze, with paths that repeatly fork and re-join, though it all leads the same way. The trail goes first through steep patches of scree, and then through a little forest of Dwarf Birch which provides some shade.
While the waterfall itself is not visible on the way down, there are still some magnificant views. We mostly chose to follow the trails further from the canyon, which contained some deep dirt ruts that were a little muddy at times, lots of roots and loose rocks, and a few shallow streams to hop over.
Back to the Car Park §
The descent is fast, and before you know it, you’re back above the cave. It’s then easy going back to the car park.
We thoroughly enjoyed the hike. It was well worth spending a day of our time in Iceland exploring Glymur Falls. Thank you to those who maintain the trail for keeping it in such good shape.