How to set up Ansible and Vagrant in WSL
These notes walk step-by-step through setting up Ansible and Vagrant in WSL, so that you can run vagrant up from within WSL to bring up a VirtualBox VM, and use Ansible to provision that VM!
Why might you want to do this? Primarily because Ansible does not support Windows, but it does work under WSL.
There are lots of scattered pieces of information across the Internet about how to do all this, but support appears to have changed over the years, which should be expected given that this is not officially supported by Ansible or Vagrant.
Regardless, so long as you set everything up just right, it does seem to work. So that you know what you’re in for, here is a summary of all the steps:
- Install WSL, and ensure that
resolv.confis configured to resolve hostnames correctly. - Configure WSL to set correct permissions on the
/mnt/directory (so that Ansible will be able to SSH with keys). - Install the same version of Vagrant in WSL and on Windows.
- Create a home directory for Vagrant within WSL (e.g. a place for it to create
.vagrant.d/). - Place a “global”
Vagrantfilein the WSL.vagrant.d/, which configuresconfig.ssh.hostfor your Windows machine. - In your project-specific
Vagrantfile, ensure the VM starts with a GUI, so that the Windows firewall prompt will appear, enabling you to allow VirtualBox through the firewall, so that Vagrant can connect via SSH. - Set several Vagrant environment variables, to enable Vagrant to run under WSL, to find VirtualBox, and to find the Vagrant WSL home directory (where
.vagrant.d/is within WSL). - Install Ansible within WSL.
- Finally, run
vagrant up.
Read on for all the fun details.
A note about support §
Just to reiterate: neither Ansible nor Vagrant officially support running under WSL, but both can be coerced into doing so:
- The Ansible control node cannot run on Windows, but it can run under WSL if configured just right, though this mode of operation is not officially supported.
- Vagrant can run under WSL, but support is in beta, and it’s considered an “advanced topic that only experienced Vagrant users […] should approach”.
In other words: here be dragons! 🔥🐉
Setup §
We will be using:
- VirtualBox as our VM provider for Vagrant.
- Ubuntu for our WSL distro.
- Ubuntu 22.04 for Vagrant VM.
(Optional) Install Windows Terminal §
I recommend installing Windows Terminal, if not already done so. This makes it easy to open WSL shells through the “+” menu.
Install Ubuntu in WSL §
In PowerShell, enable WSL with the Ubuntu distro. This may not be necessary if you’ve already set WSL up:
wsl --install -d UbuntuFix internet connection in WSL §
The resolv.conf automatically generated by WSL typically does not have a useful nameserver, so domain names do not resolve. This will prevent Vagrant from being able to download boxes, and apt-get update will hang forever, among other things. By default, resolv.conf gets generated each time WSL boots. So we need to stop WSL from generating the resolv.conf file, and then supply our own.
First, edit wsl.conf:
sudo nano /etc/wsl.confAdd the following, which stops WSL from generating the resolv.conf file:
[network]
generateResolvConf = false
Then from a separate PowerShell window, restart WSL:
wsl --shutdownNow open WSL again, delete resolv.conf then open it for editing:
sudo rm /etc/resolv.conf
sudo nano /etc/resolv.conf
Add the following configuration, using a public nameserver of your choice, such as 1.1.1.1 or 8.8.8.8.
nameserver 1.1.1.1Save and exit. To check WSL can now resolve domain names, do:
$ ping ubuntu.com
PING ubuntu.com (185.125.190.20) 56(84) bytes of data.
64 bytes from website-content-cache-1.ps5.canonical.com (185.125.190.20): icmp_seq=1 ttl=54 time=3.53 ms
64 bytes from website-content-cache-1.ps5.canonical.com (185.125.190.20): icmp_seq=2 ttl=54 time=3.74 ms
64 bytes from website-content-cache-1.ps5.canonical.com (185.125.190.20): icmp_seq=3 ttl=54 time=7.58 ms
^C
--- ubuntu.com ping statistics ---
3 packets transmitted, 3 received, 0% packet loss, time 2003ms
rtt min/avg/max/mdev = 3.525/4.949/7.583/1.864 ms
Fix SSH permissions in WSL §
To ensure SSH keys have the correct permissions for Ansible, edit /etc/wsl.conf and add the following:
# Enable extra metadata options by default
[automount]
enabled = true
root = /mnt/
options = "metadata,umask=77,fmask=11"
mountFsTab = false
To apply these changes, within an elevated PowerShell run Restart-Service -Name "LxssManager". This will kill any open WSL sessions.
Update Ubuntu §
Within WSL, run sudo apt-get update to ensure we get the latest packages. This will also verify that the nameserver is configured correctly (if not, it will hang):
Install Python in WSL §
Ansible requires Python. Install Python within WSL:
sudo apt-get install python3 python3-pip python3-venvImportant information on Vagrant and Virtualbox §
As mentioned on the Vagrant website, the version of Vagrant on Windows must match the version of Vagrant in WSL:
NOTE: When Vagrant is installed on the Windows system the version installed within the Linux distribution must match.
So we will do the following:
- Install the latest version of Vagrant in WSL.
- In WSL, run
vagrant --versionto find out which version we ended up with. - On Windows, download and install the exact same version of Vagrant.
Install Vagrant in WSL §
Install Vagrant within WSL:
sudo apt-get install vagrantGet the Vagrant version.
$ vagrant --version
Vagrant 2.2.19
So we have Vagrant v2.2.19. Your version may vary.
Install Vagrant on Windows §
Back on Windows, go to the Vagrant download page, and use the drop-down at the top-right to choose the corresponding version:
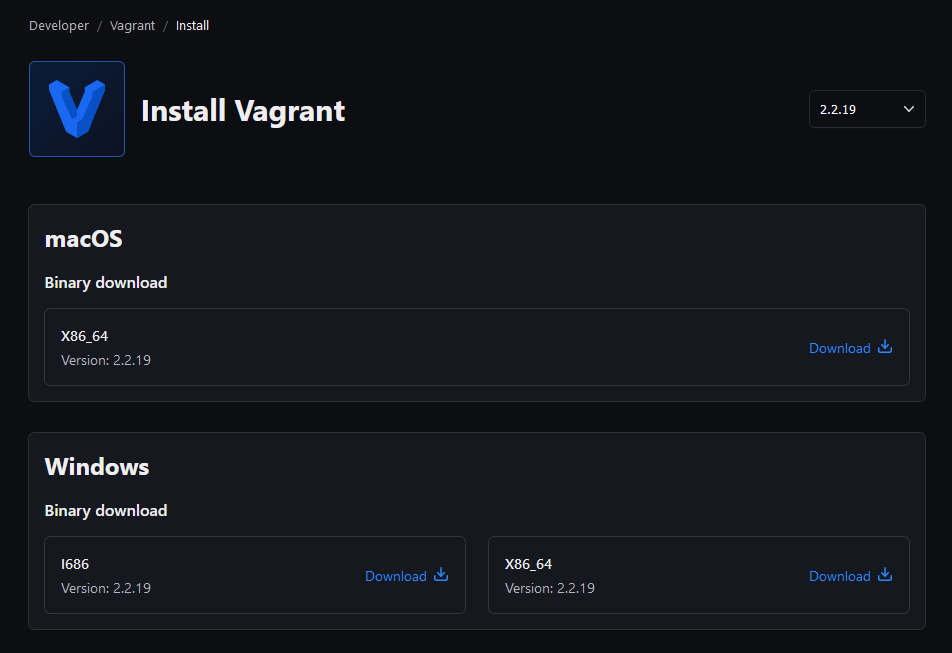
Install that Vagrant version on Windows. If Vagrant is already installed, it will first need uninstalling.
Verify that the Windows version matches the WSL version:
PS C:\Users\sam> vagrant --version
Vagrant 2.2.19
So we have Vagrant v2.2.19 on Windows, and v2.2.19 on WSL.
WSL, Vagrant and SSH §
In order for Vagrant (running in WSL) to successfully connect via SSH to a VirtualBox VM (running in Windows), it must use host machine’s IP address, not localhost. By default, whenever you run vagrant up or vagrant ssh , Vagrant will try and use localhost (127.0.0.1). In other words, when Vagrant uses SSH, it effectively does the following:
ssh vagrant@127.0.0.1 -p 2222This will fail because the VirtualBox VM is on the host, which is not at 127.0.0.1. To fix this, we need to tell Vagrant to use the IP address of the Windows host instead of 127.0.0.1. We do this by adding a config.ssh.host line to a global Vagrantfile, as covered in the following steps.
Create Vagrant home directory §
On Windows, Vagrant automatically creates a special .vagrant.d directory within your home directory. This is where the Vagrant boxes are cached.
Under WSL, Vagrant has to be told where the home directory is using an environment variable (we’ll do this later using VAGRANT_WSL_WINDOWS_ACCESS_USER_HOME_PATH).
Create the directory /mnt/c/vagrant_home/.vagrant.d/ (assuming you want your WSL Vagrant home to be at C:\vagrant_home\).
Create a global Vagrantfile §
When you run vagrant up (don’t do it just yet!), Vagrant will load together various Vagrantfiles in a particular order, and merge them. In short, we can stick some Vagrant-specific SSH configuration in a Vagrantfile in our Vagrant WSL home directory, and it will apply to any vagrant up or vagrant ssh command run within SSL. We can use this to add some machine-specific configuration that will ensure Vagrant can SSH into VirtualBox VMs correctly.
First, on your Windows machine, determine your IP address:
PS C:\Users\sam> ipconfig

...

   IPv4 Address. . . . . . . . . . . : 192.168.0.54
Then create a Vagrantfile within your WSL Vagrant home directory. For example, using the directory from earlier, this file would be at /mnt/c/vagrant_home/.vagrant.d/Vagrantfile.
Within this Vagrantfile put the following:
Vagrant.configure("2") do |config|
  config.ssh.host = "192.168.0.54"
end
Replace 192.168.0.54 with the IP address of your Windows machine.
The “global” Vagrantfile is now ready. All following changes will be in your project-specific Vagrantfile.
Create a project directory §
Create a directory for your project-specific Vagrantfile. We will use the following location:
/mnt/c/projects/my_ansible_projectCreate a project-specific Vagrantfile §
With the my_ansible_project directory (or wherever your project is), create a Vagrantfile and add the following:
Vagrant.configure("2") do |config|
  config.vm.box = "generic/ubuntu2204"

  config.vm.provision "ansible" do |ansible|
    ansible.verbose = "v"
    ansible.playbook = "playbook.yml"
  end
end
This defines an Ubuntu 22.04 machine, with Ansible for provisioning.
Create an Ansible playbook §
Create a playbook.yml in the same directory as your project-specific Vagrantfile. Within it place the following:
- hosts: all
  become: yes

  tasks:
  - name: Ensure Git is installed
    apt:
      name: git
      state: present
This playbook simply ensures Git is installed.
Ensure Vagrant runs VirtualBox with GUI §
By default, Vagrant launches VirtualBox with the GUI disabled. In my experience running Vagrant under WSL, you need to enable the GUI so that windows will prompt you to allow the VirtualBox through your firewall.
Add this line to your project-specific Vagrantfile:
  config.vm.provider "virtualbox" do |vb|
    # Display the VirtualBox GUI when booting the machine
    vb.gui = true
  end
(Optional) Change SSH port §
Optionally, add the following line to your Vagrantfile to change the default port from 2222 to 2522:
config.vm.network :forwarded_port, guest: 22, host: 2522, auto_correct: false, id: "ssh"Set Vagrant environment variables §
Add the following to your ~/.bashrc within WSL:
export VAGRANT_WSL_ENABLE_WINDOWS_ACCESS="1"
export PATH="$PATH:/mnt/c/Program Files/Oracle/VirtualBox"
export VAGRANT_WSL_WINDOWS_ACCESS_USER_HOME_PATH="/mnt/c/vagrant_home/"
The reason for these is as follows:
VAGRANT_WSL_ENABLE_WINDOWS_ACCESS: Vagrant will refuse to run under WSL until you have enabled this, to try and encourage people to read the documentation and know what they are getting in to!PATH: We need to ensure VirtualBox is on the path, so that WSL Vagrant can access the VirtualBox installed in Windows. Assuming VirtualBox is installed in the default location ofC:\Program Files\Oracle\VirtualBox, this will add it to your path.VAGRANT_WSL_WINDOWS_ACCESS_USER_HOME_PATH: This tells Vagrant where to create the.vagrant.ddirectory. This is necessary so that WSL Vagrant can find our globalVagrantfilewith the custom SSH configuration.
Install pipx in WSL §
We will use pipx to install Ansible. So first, install pipx in WSL:
python3 -m pip install --user pipx
python3 -m pipx ensurepath
Open a new shell so that we can use pipx (alternatively, close and re-open the tab):
bashInstall Ansible in WSL §
pipx install --include-deps ansibleCheck ansible is installed:
$ ansible --version
ansible [core 2.16.2]
  config file = None
  configured module search path = ['/home/sam/.ansible/plugins/modules', '/usr/share/ansible/plugins/modules']
  ansible python module location = /home/sam/.local/share/pipx/venvs/ansible/lib/python3.10/site-packages/ansible
  ansible collection location = /home/sam/.ansible/collections:/usr/share/ansible/collections
  executable location = /home/sam/.local/bin/ansible
  python version = 3.10.12 (main, Nov 20 2023, 15:14:05) [GCC 11.4.0] (/home/sam/.local/share/pipx/venvs/ansible/bin/python)
  jinja version = 3.1.2
  libyaml = True
Putting it into action §
We’re finally ready to run vagrant up!
If not already there, go into your project directory (where Vagrantfile and playbook.yml are located).
cd /mnt/c/projects/my_ansible_project/Now run vagrant up and it should work as follows. If a Windows firewall popup appears, be sure to approve access:
$ vagrant up
Bringing machine 'default' up with 'virtualbox' provider...
==> default: Importing base box 'generic/ubuntu2204'...
==> default: Matching MAC address for NAT networking...
==> default: Checking if box 'generic/ubuntu2204' version '4.3.2' is up to date...
==> default: Setting the name of the VM: platform_default_1702643517994_50176
==> default: Clearing any previously set network interfaces...
==> default: Preparing network interfaces based on configuration...
    default: Adapter 1: nat
==> default: Forwarding ports...
    default: 22 (guest) => 2522 (host) (adapter 1)
==> default: Running 'pre-boot' VM customizations...
==> default: Booting VM...
==> default: Waiting for machine to boot. This may take a few minutes...
    default: SSH address: 192.168.0.54:2522
    default: SSH username: vagrant
    default: SSH auth method: private key
    default: Warning: Connection reset. Retrying...
    default: Warning: Remote connection disconnect. Retrying...
    default: Warning: Connection reset. Retrying...
    default: Warning: Connection reset. Retrying...
    default: Warning: Connection reset. Retrying...
    default: Warning: Remote connection disconnect. Retrying...
    default: Warning: Connection reset. Retrying...
    default: Warning: Remote connection disconnect. Retrying...
    default: Warning: Connection reset. Retrying...
    default: Warning: Remote connection disconnect. Retrying...
    default: Warning: Connection reset. Retrying...
    default: Warning: Remote connection disconnect. Retrying...
    default: Warning: Connection reset. Retrying...
    default: Warning: Remote connection disconnect. Retrying...
    default: Warning: Connection reset. Retrying...
    default: Warning: Connection reset. Retrying...
    default: Warning: Remote connection disconnect. Retrying...
    default: Warning: Connection reset. Retrying...
    default: Warning: Remote connection disconnect. Retrying...
    default: Warning: Connection reset. Retrying...
    default:
    default: Vagrant insecure key detected. Vagrant will automatically replace
    default: this with a newly generated keypair for better security.
    default:
    default: Inserting generated public key within guest...
    default: Removing insecure key from the guest if it's present...
    default: Key inserted! Disconnecting and reconnecting using new SSH key...
==> default: Machine booted and ready!
==> default: Checking for guest additions in VM...
==> default: Running provisioner: ansible...
    default: Running ansible-playbook...
PYTHONUNBUFFERED=1 ANSIBLE_FORCE_COLOR=true ANSIBLE_HOST_KEY_CHECKING=false ANSIBLE_SSH_ARGS='-o UserKnownHostsFile=/dev/null -o IdentitiesOnly=yes -o ControlMaster=auto -o ControlPersist=60s' ansible-playbook --connection=ssh --timeout=30 --limit="default" --inventory-file=/mnt/c/projects/my_ansible_project/.vagrant/provisioners/ansible/inventory -v playbook.yml
No config file found; using defaults

PLAY [all] *********************************************************************

TASK [Gathering Facts] *********************************************************
ok: [default]

TASK [Ensure Git is installed] *************************************************
ok: [default] => {"cache_update_time": 1695525007, "cache_updated": false, "changed": false}

PLAY RECAP *********************************************************************
default                    : ok=2    changed=0    unreachable=0    failed=0    skipped=0    rescued=0    ignored=0
Congratulations! You just used Vagrant to bring up a VM in VirtualBox, and provisioned it with Ansible, all from within WSL!
If it does not work, check out the troubleshooting section below.
Troubleshooting §
There are lots of things that can go wrong. Fortunately, lots of the fixes are documented below:
Error: Vagrant reports Vagrant failed to initialize at a very early stage §
If you get the following error, it may be because you’ve not set VAGRANT_WSL_ENABLE_WINDOWS_ACCESS as specified earlier:
$ vagrant up
Vagrant failed to initialize at a very early stage:

Vagrant is unable to use the VirtualBox provider from the Windows Subsystem for
Linux without access to the Windows environment. Enabling this access must be
done with caution and an understanding of the implications. For more information
on enabling Windows access and using VirtualBox from the Windows Subsystem for
Linux, please refer to the Vagrant documentation:

  https://www.vagrantup.com/docs/other/wsl.html
Error: Vagrant reports Vagrant has detected that you have a version of VirtualBox installed that is not supported by this version of Vagrant §
If you get the following error, it may be because your version of VirtualBox is too recent. At time of writing, v7.0 is the most recent, whereas Vagrant requires between v6.1 and v4.0.
$ vagrant up
The provider 'virtualbox' that was requested to back the machine
'default' is reporting that it isn't usable on this system. The
reason is shown below:

Vagrant has detected that you have a version of VirtualBox installed
that is not supported by this version of Vagrant. Please install one of
the supported versions listed below to use Vagrant:

4.0, 4.1, 4.2, 4.3, 5.0, 5.1, 5.2, 6.0, 6.1

A Vagrant update may also be available that adds support for the version
you specified. Please check www.vagrantup.com/downloads.html to download
the latest version.
To fix this, download VirtualBox 6.1 from here (click “Windows hosts”), then run the installer. You may want to uninstall your existing VirtualBox installation first.
Error: Vagrant reports The VirtualBox VM was created with a user that doesn't match the current user running Vagrant §
If Vagrant errors because the UID does not match, as shown below, this might be because there is already a Vagrant VM in that directory which was created by the Windows VirtualBox:
$ vagrant up
The VirtualBox VM was created with a user that doesn't match the
current user running Vagrant. VirtualBox requires that the same user
be used to manage the VM that was created. Please re-run Vagrant with
that user. This is not a Vagrant issue.

The UID used to create the VM was: 0
Your UID is: 1000
The easy fix is just to delete the VM:
rm -rf .vagrant/Another solution involves modifying .vagrant/machines/default/virtualbox/creator_uid, changing the UID to match what is expected.
Error: Vagrant stuck on Warning: Connection refused. Retrying... §
If you get stuck forever at default: Warning: Connection refused. Retrying... like the following, it is possible that Windows firewall is blocking VirtualBox until you allow the request. This is fixed by settting vb.gui = true, which will cause the VirtualBox GUI to display, and trigger Windows to display the firewall prompt, for you to hit accept:
$ vagrant up
Bringing machine 'default' up with 'virtualbox' provider...
==> default: Importing base box 'generic/ubuntu2204'...
==> default: Matching MAC address for NAT networking...
==> default: Checking if box 'generic/ubuntu2204' version '4.3.2' is up to date...
==> default: Setting the name of the VM: platform_default_1702562442709_71017
==> default: Clearing any previously set network interfaces...
==> default: Preparing network interfaces based on configuration...
    default: Adapter 1: nat
==> default: Forwarding ports...
    default: 22 (guest) => 2522 (host) (adapter 1)
==> default: Running 'pre-boot' VM customizations...
==> default: Booting VM...
==> default: Waiting for machine to boot. This may take a few minutes...
    default: SSH address: 127.0.0.1:2522
    default: SSH username: vagrant
    default: SSH auth method: private key
    default: Warning: Connection refused. Retrying...
    default: Warning: Connection refused. Retrying...
    default: Warning: Connection refused. Retrying...
If you still have issues, check whether you can SSH into the VM from Windows itself, rather than from within WSL. Open a terminal in Windows and manually try to SSH into your VM:
ssh vagrant@127.0.0.1 -p 2522If this works, it indicates that the problem is a networking issue between WSL and your VirtualBox VM. If it does not work, then the issue might be with your VM, your firewall, or elsewhere.
Error: Ansible fails with WARNING: UNPROTECTED PRIVATE KEY FILE! §
If you get an error like the following, it can be fixed by ensuring you have set the SSH permissions in WSL correctly.
$ vagrant up
Bringing machine 'default' up with 'virtualbox' provider...
==> default: Importing base box 'generic/ubuntu2204'...
==> default: Matching MAC address for NAT networking...
==> default: Checking if box 'generic/ubuntu2204' version '4.3.8' is up to date...
==> default: Setting the name of the VM: platform_default_1702575030720_37678
==> default: Clearing any previously set network interfaces...
==> default: Preparing network interfaces based on configuration...
    default: Adapter 1: nat
==> default: Forwarding ports...
    default: 22 (guest) => 2522 (host) (adapter 1)
==> default: Running 'pre-boot' VM customizations...
==> default: Booting VM...
==> default: Waiting for machine to boot. This may take a few minutes...
    default: SSH address: 192.168.0.54:2522
    default: SSH username: vagrant
    default: SSH auth method: private key
    default: Warning: Connection reset. Retrying...
    default: Warning: Remote connection disconnect. Retrying...
    default:
    default: Vagrant insecure key detected. Vagrant will automatically replace
    default: this with a newly generated keypair for better security.
    default:
    default: Inserting generated public key within guest...
    default: Removing insecure key from the guest if it's present...
    default: Key inserted! Disconnecting and reconnecting using new SSH key...
==> default: Machine booted and ready!
==> default: Checking for guest additions in VM...
==> default: Running provisioner: ansible...
    default: Running ansible-playbook...
PYTHONUNBUFFERED=1 ANSIBLE_FORCE_COLOR=true ANSIBLE_HOST_KEY_CHECKING=false ANSIBLE_SSH_ARGS='-o UserKnownHostsFile=/dev/null -o IdentitiesOnly=yes -o ControlMaster=auto -o ControlPersist=60s' ansible-playbook --connection=ssh --timeout=30 --limit="default" --inventory-file=/mnt/c/projects/my_ansible_project/.vagrant/provisioners/ansible/inventory -v playbook.yml
No config file found; using defaults

PLAY [all] *********************************************************************

TASK [Gathering Facts] *********************************************************
fatal: [default]: UNREACHABLE! => {"changed": false, "msg": "Failed to connect to the host via ssh: Warning: Permanently added '[192.168.0.54]:2522' (ED25519) to the list of known hosts.\r\n@@@@@@@@@@@@@@@@@@@@@@@@@@@@@@@@@@@@@@@@@@@@@@@@@@@@@@@@@@@\r\n@         WARNING: UNPROTECTED PRIVATE KEY FILE!          @\r\n@@@@@@@@@@@@@@@@@@@@@@@@@@@@@@@@@@@@@@@@@@@@@@@@@@@@@@@@@@@\r\nPermissions 0777 for '/mnt/c/projects/my_ansible_project/.vagrant/machines/default/virtualbox/private_key' are too open.\r\nIt is required that your private key files are NOT accessible by others.\r\nThis private key will be ignored.\r\nLoad key \"/mnt/c/projects/my_ansible_project/.vagrant/machines/default/virtualbox/private_key\": bad permissions\r\nvagrant@192.168.0.54: Permission denied (publickey,password).", "unreachable": true}

PLAY RECAP *********************************************************************
default                    : ok=0    changed=0    unreachable=1    failed=0    skipped=0    rescued=0    ignored=0

Ansible failed to complete successfully. Any error output should be
visible above. Please fix these errors and try again.
Appendix §
Complete files §
Here are the full versions of all files used in this post:
Vagrant.configure("2") do |config|
  config.ssh.host = "192.168.0.54"
endVagrant.configure("2") do |config|
config.vm.box = "generic/ubuntu2204"
config.vm.network :forwarded_port, guest: 22, host: 2522, auto_correct: false, id: "ssh"
config.vm.provider "virtualbox" do |vb|
# Display the VirtualBox GUI when booting the machine
vb.gui = true
end
config.vm.provision "ansible" do |ansible|
ansible.verbose = "v"
ansible.playbook = "playbook.yml"
end
end- hosts: all
become: yes
tasks:
- name: Ensure Git is installed
apt:
name: git
state: presentAbout the virtualbox_WSL2 plugin §
There is a Vagrant plugin called virtualbox_WSL2, which is often recommended. In my experience it is not necessary. I’m not sure if this is because something has changed in Vagrant in the past couple of years since it was released.
Cable connection §
Some advice online mentions needing to ensure the nework cable is connected in VirtualBox by adding the following configuration:
vb.customize ["modifyvm", :id, "--cableconnected1", "on"]This didn’t seem to be necessary to me. In the VirtualBox settings, the cable was always connected by default.
Thanks §
Thanks to everyone who has shared tips online on how to get Ansible and/or Vagrant working in WSL. In particular:
- This issue by Jeff Geerling and his invaluable book Ansible for DevOps.
- This issue by Martin Bergman on getting SSH working for Ansible in WSL.